


What Is a Corneal Topography Test and Why Is It Done?
Dr. Krishna Vaitheeswaran
Conventional wisdom says that a standard eye examination tells everything about corneal health. That advice is not just incomplete – it’s potentially missing early warning signs that could save someone’s vision. The front surface of the eye, that clear dome called the cornea, has a complex geography that a simple torch and magnifying lens simply cannot capture. Think of it like trying to understand a mountain range by looking at a flat photograph versus creating a detailed topographical map. One gives you a vague idea. The other reveals every contour, every subtle dip and rise that determines how light bends its way into the eye.
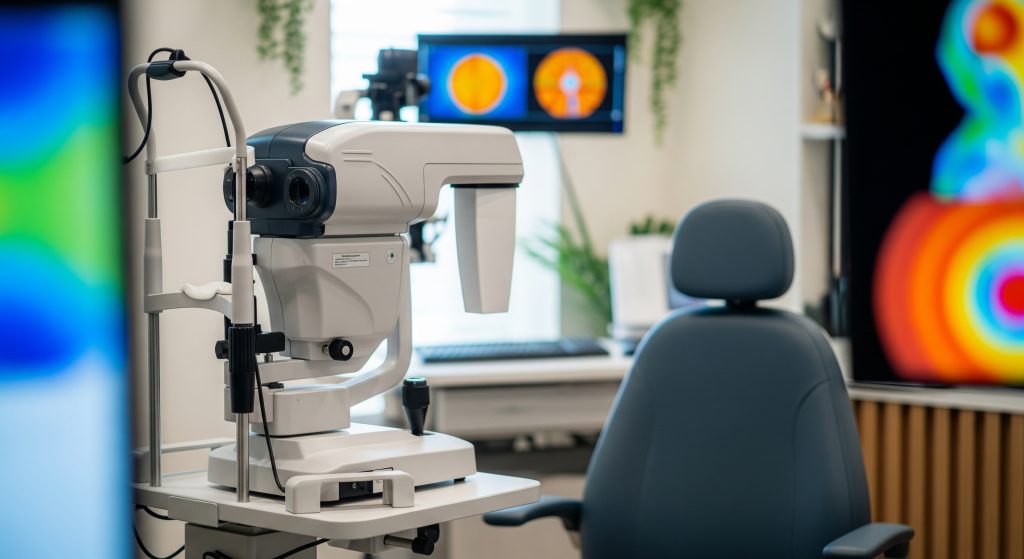
A corneal topography test does exactly that – it creates a precise three-dimensional map of the cornea’s surface. This matters enormously for anyone considering laser eye surgery, those struggling with irregular astigmatism, or patients being monitored for conditions like keratoconus. The colourful maps these machines produce might look like abstract art, but they’re actually diagnostic gold. They reveal abnormalities that would otherwise remain hidden until symptoms become unmistakable and treatment options narrow considerably.
Types of Corneal Topography Tests and Their Clinical Applications
Placido Disc Topography
The granddaddy of corneal mapping technology uses concentric illuminated rings – the Placido disc – projected onto the cornea. It’s elegantly simple. Light rings reflect off the front surface, and any distortion in those reflected rings reveals irregularities in corneal shape. The resulting image analysis provides data about the anterior corneal curvature with remarkable precision.
Most high-street optometrists still rely on Placido-based systems for routine screening. They’re fast, non-invasive, and excellent at detecting surface abnormalities. But here’s the limitation: they only assess the front surface. The posterior cornea – where early keratoconus often shows its first subtle changes – remains invisible to this technology. For basic refractive assessments and contact lens fitting, Placido systems remain workhorses. For comprehensive corneal analysis, specialists typically reach for something more sophisticated.
Scanning Slit Topography
This technology represents a significant step forward. A thin slit of light sweeps across the cornea, building a detailed cross-sectional view. Unlike Placido systems, scanning slit topography analyses both anterior and posterior corneal surfaces, providing comprehensive elevation maps crucial for diagnosing conditions like keratoconus.
Research published in the NIH confirms that scanning slit topography offers high sensitivity for detecting subtle corneal changes – the kind that make all the difference in monitoring disease progression. The technique evaluates corneal thickness and curvature simultaneously, which proves critical when determining treatment plans for refractive surgery candidates.
Studies examining scanning slit technology in keratoconus patients demonstrate its diagnostic accuracy through receiver operating characteristic (ROC) analysis – basically a statistical measure of how well a test distinguishes between healthy and diseased corneas. The findings, documented by International Journal of Ophthalmology, show substantial differences in corneal metrics between keratoconus patients and healthy individuals, emphasising the tool’s clinical utility.
Scheimpflug Imaging Systems
Here’s where things get genuinely impressive. Scheimpflug imaging involves a rotating camera system that captures precise three-dimensional images of the anterior segment. The Scheimpflug principle (named after the Austrian army captain who invented it for aerial photography) allows the camera to maintain sharp focus across an angled plane – resulting in minimal distortion and maximum depth of focus.
Systems like the Pentacam have become the gold standard in specialist eye clinics. According to StatPearls, this technology generates elevation maps that aid in identifying ectatic diseases and supporting refractive surgical planning. The rotating camera captures images at precise angles, enabling calculation of corneal pachymetry – that’s thickness mapping in plain English – essential for pre-surgical assessment.
What makes Scheimpflug imaging particularly valuable? It detects corneal distortions more accurately than traditional methods. For surgeons planning LASIK or other refractive procedures, this detailed anterior and posterior corneal data proves invaluable for intraocular lens power calculations and predicting postoperative astigmatism.
Optical Coherence Tomography
OCT takes corneal imaging into another dimension entirely. Using light waves rather than mechanical scanning, it provides high-resolution cross-sectional images of the corneal structure – visualising individual layers with extraordinary clarity.
Anterior Segment OCT (AS-OCT) enables non-invasive evaluation of epithelial thickness and post-surgical changes. This capability proves particularly useful when managing keratoconus and guiding treatment decisions. The technology’s ability to visualise discrete corneal layers makes it essential for monitoring patient progress and optimising surgical outcomes.
Recent advancements in OCT facilitate comprehensive mapping that includes both anterior and posterior surfaces, enhancing diagnostic capabilities significantly. Clinical applications extend from monitoring corneal disease progression to informing pre- and post-operative treatment decisions. It’s the kind of technology that transforms follow-up appointments from educated guesswork into precise measurement.
Clinical Applications for Vision Correction
Corneal topography isn’t just for diagnosing problems – it’s fundamental to fixing them. LASIK surgeons rely on topographic mapping to assess corneal structure and identify patients at risk for surgical complications. The precise data allows optimisation of surgical parameters, enhancing postoperative visual outcomes considerably.
The applications extend beyond laser surgery:
-
Designing customised contact lenses for irregular corneas
-
Planning collagen cross-linking treatments for keratoconus
-
Assessing candidacy for implantable collamer lenses
-
Monitoring response to orthokeratology (overnight contact lens wear)
Every refractive procedure benefits from detailed corneal mapping. The more information available before surgery, the better the outcomes. It’s that straightforward.
Pre-surgical Planning Uses
The single most frustrating part of refractive surgery complications is that many are preventable with proper screening. Corneal topography has become non-negotiable in pre-operative evaluation for precisely this reason.
Before any corneal surgery, topography identifies:
-
Subclinical keratoconus that might progress after LASIK
-
Irregular astigmatism that requires special treatment approaches
-
Corneal thickness variations that affect tissue removal calculations
-
Previous contact lens warpage that needs resolution before surgery
The week after implementing comprehensive pre-surgical topographic screening at many clinics, the rate of unexpected surgical complications dropped noticeably. That’s when surgeons knew the investment in advanced imaging technology was justified.
Understanding Corneal Topography Maps and Interpretation
Axial Power Maps
Axial maps (sometimes called sagittal maps) display the curvature of the cornea in dioptres – the unit measuring light-bending power. They provide a quick overview of corneal shape that’s intuitive for most clinicians to interpret. The steeper the cornea, the higher the dioptre value.
Normal corneas show a fairly uniform colour distribution, slightly steeper centrally than peripherally. Keratoconic corneas display a characteristic inferior steepening pattern – a telltale sign that experienced practitioners spot immediately. These maps remain the most commonly used format for general corneal topography interpretation.
Elevation Maps
Elevation maps compare the actual corneal surface to a perfect reference sphere – typically a best-fit sphere calculated by the software. Areas raised above this reference appear in warmer colours (reds, oranges); areas below appear in cooler colours (blues, greens).
Sounds simple, right? In practice, elevation data requires careful interpretation. The choice of reference sphere significantly affects how abnormalities appear. Posterior elevation maps have become particularly important for keratoconus diagnosis, often showing changes before the anterior surface reveals anything suspicious.
Pachymetry Maps
These maps display corneal thickness across the entire surface. Normal corneas are thinnest centrally (approximately 530-550 micrometres) and progressively thicker toward the periphery. In keratoconus, the thinnest point shifts toward the cone’s apex – often inferiorly displaced from the central position.
For refractive surgery planning, pachymetry determines how much tissue can safely be removed. Too thin, and the structural integrity becomes compromised. The maps also reveal asymmetry between the two eyes – another red flag for underlying corneal disease.
Reading Colour-Coded Patterns
The rainbow colour scale used in most topographic displays follows a logical pattern:
|
Colour |
Meaning in Curvature Maps |
Meaning in Elevation Maps |
|---|---|---|
|
Red/Orange |
Steeper curvature (higher power) |
Elevated above reference |
|
Green |
Average/normal curvature |
Near reference surface |
|
Blue/Purple |
Flatter curvature (lower power) |
Depressed below reference |
A uniform green central zone with gradual transition to blue peripherally suggests a healthy cornea. Hot spots of red or irregular colour distribution warrant further investigation.
Normal vs Abnormal Topography Patterns
Learning to distinguish normal variations from pathology takes practice. Some patterns to recognise:
Normal patterns:
-
Round – uniform curvature throughout
-
Oval – with-the-rule astigmatism (steeper vertically)
-
Symmetric bowtie – regular astigmatism
Suspicious patterns:
-
Asymmetric bowtie – possible early keratoconus
-
Inferior steepening – classic keratoconus indicator
-
Skewed radial axes – irregular astigmatism
-
Central island – may indicate contact lens warpage
Key Measurements and Values
Several numerical indices help quantify corneal topography interpretation:
-
K readings – average corneal curvature, typically 42-45 dioptres
-
Sim K – simulated keratometry from the central 3mm zone
-
I-S value – difference between inferior and superior hemi-meridian power (should be less than 1.4D)
-
SRAX – skewed radial axes index for asymmetry detection
-
Q value – asphericity measurement (normal range -0.2 to -0.4)
Don’t even bother memorising every index until understanding the basic map patterns. The indices quantify what experienced eyes already see in the colourful displays.
Corneal Topography in Diagnosing Eye Conditions
Detecting Keratoconus Progression
Corneal topography in keratoconus serves two critical purposes: initial diagnosis and ongoing monitoring. Early keratoconus diagnosis has become increasingly important since collagen cross-linking treatments can halt progression – but only if caught before significant damage occurs.
Characteristic topographic findings in keratoconus include:
-
Inferior corneal steepening with displaced apex
-
Asymmetric curvature between the two eyes
-
Progressive increase in maximum keratometry values
-
Elevated posterior surface in the cone region
-
Localised corneal thinning at the apex
Regular topographic monitoring – typically every 6-12 months in established cases – tracks disease progression. An increase of more than 1 dioptre in maximum K reading over a year suggests active progression requiring intervention.
Identifying Pellucid Marginal Degeneration
This condition resembles keratoconus but affects a different corneal region – typically an inferior crescent-shaped band about 1-2mm from the limbus. The topographic appearance is distinctive: a crab-claw or kissing birds pattern with steep cornea against the rule.
Why does this matter? Pellucid marginal degeneration requires different management approaches than keratoconus. Mistaking one for the other leads to suboptimal treatment planning. The topographic pattern provides the crucial differentiating evidence.
Diagnosing Post-LASIK Ectasia
One of ophthalmology’s most dreaded complications – progressive corneal bulging after laser refractive surgery – becomes visible on topography before patients notice visual symptoms. Early detection through regular post-operative mapping enables timely cross-linking intervention.
Risk factors for post-LASIK ectasia include abnormal pre-operative topography, excessive tissue removal, and thin residual stromal bed. This explains why comprehensive topographic screening before LASIK has become absolutely essential rather than optional.
Assessing Corneal Scarring
Corneal scars from infection, trauma, or previous surgery create localised irregularities detectable on topography. The maps reveal how scars affect light transmission and visual function, guiding decisions about therapeutic contact lenses, phototherapeutic keratectomy, or corneal transplantation.
The severity of irregularity on topography often correlates with visual symptoms better than clinical appearance alone. A faint scar that looks innocuous can produce significant optical disturbance when topography reveals its irregular surface.
Evaluating Irregular Astigmatism
Regular astigmatism – the kind correctable with standard glasses – appears as a symmetric bowtie pattern on topography. Irregular astigmatism defies simple correction. Its chaotic topographic appearance explains why patients struggle with spectacles and standard contact lenses.
Topography guides management by quantifying the irregularity and identifying the best approach: rigid gas permeable contact lenses, scleral lenses, or surgical options like intrastromal corneal ring segments.
Monitoring Contact Lens Warpage
Long-term contact lens wear – particularly with rigid lenses – can temporarily reshape the cornea. This corneal warpage creates misleading topographic patterns that must be distinguished from genuine pathology.
Patients considering LASIK need to discontinue contact lenses for weeks before assessment: soft lenses for at least two weeks, rigid lenses for several weeks or longer. Serial topographic measurements confirm when the cornea has returned to its natural shape, ensuring accurate surgical planning.
What to Expect During and After the Test
Test Preparation Requirements
Preparation is minimal but important:
-
Remove contact lenses before the appointment (soft lenses for 24-48 hours; rigid lenses require longer depending on wear duration)
-
Avoid eye makeup that might interfere with measurements
-
Bring current spectacles and contact lens prescription information
-
List any eye drops currently being used
No fasting, no pupil dilation, no needles. The test is completely non-invasive.
Step-by-Step Test Procedure
The actual procedure is surprisingly unremarkable. Patients sit at a chin rest, similar to the position for any eye examination. The machine positions automatically, and a target light appears for fixation. Then the magic happens – in seconds, the device captures thousands of data points mapping the corneal surface.
Most patients blink reflexively the first time. That’s fine. The technician simply repositions and captures another image. Good-quality images require the patient to keep both eyes open and fixate steadily for approximately 2-3 seconds.
Duration and Comfort Level
From sitting down to standing up: approximately 5-10 minutes per eye. The actual measurement takes mere seconds. Is it uncomfortable? Not at all. Nothing touches the eye. No anaesthetic drops required. The brightness of the measurement lights causes momentary dazzle but nothing more.
Children and anxious patients occasionally struggle with maintaining fixation, but patient technicians work around this with practice runs and reassurance.
Understanding Your Results
Results are available immediately – colourful maps appearing on the screen moments after capture. The ophthalmologist or optometrist interprets these maps, explaining findings in context.
Normal results show smooth, symmetric colour distribution. Abnormalities warrant further discussion: what they mean, whether additional testing is needed, and implications for treatment planning.
Patients should request a copy of their topography for their records. Comparing serial maps over time provides valuable progression data, especially for conditions like keratoconus.
Follow-up Recommendations
Follow-up frequency depends on findings:
|
Clinical Situation |
Recommended Follow-up |
|---|---|
|
Normal screening |
Every 2-5 years or as symptoms arise |
|
Pre-refractive surgery |
Confirm stability before proceeding |
|
Keratoconus suspect |
Every 3-6 months initially |
|
Established keratoconus |
Every 6-12 months |
|
Post-surgical monitoring |
As per surgeon’s protocol |
Making Informed Decisions About Corneal Topography Testing
The question isn’t whether corneal topography test provides valuable information – it clearly does. The question is when testing becomes necessary versus optional.
Essential indications include:
-
Pre-operative evaluation for any refractive surgery
-
Suspected keratoconus or other corneal ectasia
-
Unexplained visual disturbance despite normal refraction
-
Contact lens fitting difficulties
-
Family history of keratoconus
Beyond these clear indications, topography serves as a valuable baseline. Having normal topographic data recorded makes future comparisons meaningful should symptoms develop later.
For patients with established keratoconus or corneal disease, regular monitoring through topography guides treatment timing and intensity. It transforms subjective symptoms into objective measurements that drive clinical decisions.
The technology continues advancing. What required specialist equipment a decade ago now appears in community optometry practices. Access to corneal topography testing has never been easier – and for those with suspicious findings or planned procedures, seeking this detailed assessment simply makes sense.
Frequently Asked Questions
How much does a corneal topography test cost in India?
Costs vary considerably depending on the facility and technology used. Basic Placido-based topography typically ranges from Rs 500-1500 at standard eye clinics. Advanced Scheimpflug or OCT-based assessments at tertiary centres may cost Rs 1500-3500. Many hospitals include topography within comprehensive pre-surgical evaluation packages.
Can corneal topography detect early-stage keratoconus?
Yes – this is precisely where topography excels. Subtle changes in corneal curvature and elevation appear on topographic maps long before patients notice visual symptoms. Early keratoconus diagnosis through topographic screening enables timely intervention with cross-linking to prevent progression. Posterior elevation changes often precede anterior surface abnormalities, making advanced imaging systems particularly valuable for early detection.
Is corneal topography painful or uncomfortable?
Not at all. Nothing touches the eye during the test. Patients simply look at a target while the device captures images of reflected light patterns. The measurement takes seconds. Bright lights may cause temporary dazzle, but there’s no pain, no drops required, and no recovery time needed afterwards.
How often should corneal topography be repeated for keratoconus monitoring?
Monitoring frequency depends on disease severity and stability. Active or progressing keratoconus typically requires assessment every 3-6 months. Stable disease may only need annual monitoring. Young patients (under 30) require more frequent monitoring due to higher progression risk. Following cross-linking treatment, monitoring continues to confirm treatment success.
What’s the difference between corneal topography and regular eye examination?
Standard eye examinations assess visual acuity, refraction, and overall eye health through clinical observation. Corneal topography specifically maps the corneal surface in precise detail – measuring thousands of points to create comprehensive curvature, elevation, and thickness data. A regular examination might miss subtle corneal irregularities that topography reveals clearly. The two assessments complement each other rather than replace one another.
Can children undergo corneal topography testing?
Children can certainly undergo topography, though cooperation requirements make it challenging for very young patients. Children need to sit still and maintain steady fixation for a few seconds. Most children over age 6-7 manage this successfully with patient technicians. Earlier testing is possible when clinically necessary, though results may be less reliable. For children with suspected keratoconus or undergoing orthokeratology, topography provides essential monitoring data.