


The Importance of Lens Protection: Tips for Safe Camera Use
Dr. Krishna Vaitheeswaran
Glowing reviews focus on image quality. Fewer discuss the quiet habits that protect it. Lens protection is not glamourous, yet it is the discipline that keeps optics clean, coatings intact, and autofocus reliable. I treat it as part of the craft, not an optional extra. The goal is simple. Avoid preventable damage and preserve maximum performance in the field and in the studio.
Essential Lens Protection Methods
UV Filters for Daily Protection
I recommend a UV filter for daily duty when working outdoors or in mixed environments. A modern, multi-coated filter adds a sacrificial layer against dust, salt spray, and light knocks. On most current lenses, a high quality UV filter does not measurably reduce sharpness. It also makes cleaning straightforward, because grit and salt sit on the flat glass, not on delicate front elements. That is practical risk control.
-
Select multi-coated or nano-coated glass. It lowers flare and maintains transmission.
-
Match the filter diameter precisely. Avoid step rings if you change lenses quickly.
-
Carry a spare. If the filter shatters after an impact, I can swap and continue.
I do not fit cheap, uncoated filters. They can increase ghosting and lower contrast. In harsh conditions near surf or desert dust, a UV filter for lens protection saves time and gives confidence. The small cost offsets a far larger repair bill.
Lens Caps and Rear Caps
Front and rear caps are basic, but they prevent a surprising amount of damage. The front cap stops pocket lint, rain, and accidental scuffs. The rear cap seals the mount and protects contacts. I put caps on during every lens change. That habit prevents many avoidable cleaning sessions and keeps dust out of the camera chamber.
-
Keep a spare front cap in the bag. They get lost more than expected.
-
Use branded or snug third party caps. Loose caps fall off without notice.
-
Cap lenses before moving locations. Especially if wind or sand is present.
One more point. Always align the cap without dragging grit across the glass. A moment of care matters.
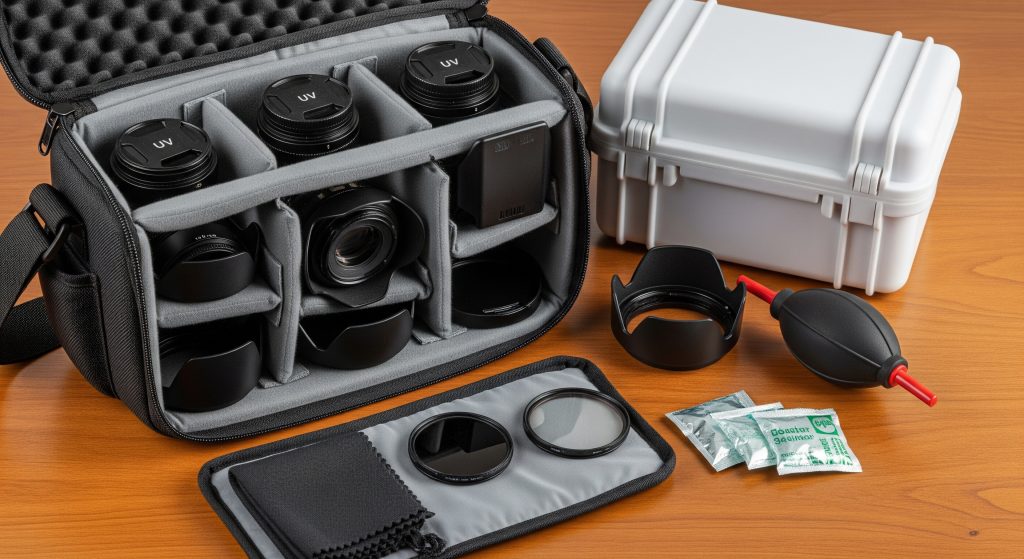
Protective Cases and Pouches
Good cases absorb shock and shield gear from weather. Soft pouches are light and quick. Hard cases add structure and stronger impact resistance in transit. I pair both. Lenses ride in individual padded pouches inside a structured backpack. For checked luggage or rough travel, I use a hard case with custom foam. The priority is a snug fit with no rattle.
-
Choose pouches with padding and soft linings to avoid micro scratches.
-
Water resistant fabrics help when moving between vehicles and locations.
-
Hard cases with custom cut foam keep lenses stable even when dropped.
Neoprene options add a neat balance of weight and cushioning. Cylindrical formats also load and unload quickly. That speeds work and reduces handling risk.
Screen Protectors for LCD
The rear LCD is not the lens, but it guides exposure and focus checks. A tempered glass protector saves the panel from scratches and light impacts. It also resists smudges. I prefer rigid glass over film for clarity and easy cleaning. In rain or on dusty trails, that extra layer keeps resale value intact.
-
Apply on a dust free desk. Use the alignment frame if supplied.
-
Replace protectors when chipped. Sharp edges can catch on clothing.
-
Clean with a microfibre cloth, not a shirt sleeve or tissue.
This is small insurance. It pays back quickly.
Weather-Sealed Equipment Options
Weather sealing resists moisture, dust, and humidity ingress. Bodies and lenses use gaskets and seals to block the elements. It is not a licence to be careless. It is a safety margin. The sealing is only as good as the weakest point, so pairing a sealed body with a non sealed lens still leaves a gap. That gap matters in rain and blowing sand.
-
Check manufacturer sealing notes before a job. Lens mount and switch gaskets are key points.
-
Use sealed lenses when possible. A sealed system performs best as a whole.
-
Carry a rain cover even with sealed gear. Seals are protective, not absolute.
If underwater or heavy spray is expected, use proper housings. No shortcuts there.
Proper Storage and Handling Techniques
How to Store Camera Lenses
Storage is where most lenses either remain pristine or begin to degrade. I store lenses upright with both caps attached. Each lens sits in a padded compartment or a dedicated case. I avoid stacking lenses on their sides for long periods. That can create pressure points on the barrel and rings.
-
Label cases clearly. Reduce handling time and unnecessary rummaging.
-
Use small desiccant packs in compartments. Replace or recharge them regularly.
-
Inspect stored lenses quarterly for dust, haze, or dried lubricant traces.
If a colleague asks how to store camera lenses, my answer is consistent. Upright, capped, padded, and in controlled humidity. Simple and reliable.
Humidity Control Methods
Fungal growth is the quiet enemy in humid climates. I maintain a controlled environment between 40 percent and 50 percent relative humidity. Dry cabinets do this well. Desiccant packets help, but they require maintenance. Over drying can be harmful for some rubber parts. Aim for a stable mid range rather than extreme dryness.
-
Use a hygrometer in the storage space. Trust measured values, not guesswork.
-
Recharge silica gel packs following manufacturer guidance.
-
Ventilate storage periodically if not using a sealed dry cabinet.
Consistency over time is what prevents fungus. Not one dramatic intervention.
Temperature Considerations
Rapid temperature shifts cause condensation inside and on optics. I bag lenses when moving from cold to warm environments. The bag warms slowly and prevents internal moisture. I also avoid leaving gear in hot cars. Extended heat can deform lubricants and affect adhesives. Cold is workable with care. Heat is less forgiving.
-
Use insulated wraps to buffer temperature changes in the field.
-
Let equipment acclimatise before uncapping in humid rooms.
-
Keep spare microfibres for dew management on night shoots.
Moisture on glass is manageable. Moisture inside the lens is not.
Safe Transport Guidelines
Transit is where most drops and knocks occur. I secure every lens in padded cells with dividers that fit tight. Straps and harnesses reduce fatigue and handling mistakes. When walking, I keep the bag closed between changes. That habit cuts down on dust ingress and accidental spills.
-
Distribute weight low and centred to maintain balance.
-
Use a camera strap around the neck or wrist during swapping.
-
Place bags on stable, dry ground. Avoid edges and moving vehicles.
In vehicles, long lenses lie parallel to travel direction with padding at both ends. Small adjustments prevent big incidents.
Cleaning Before Storage
I never store a dirty lens. Clean, dry, and capped is the rule. I use an air blower first, then a soft brush, then a microfibre cloth with a drop of optical solution if required. Solution goes on the cloth, not on the glass. Over cleaning wears coatings, so I clean only when I see marks that affect results.
-
Blow first, brush second, wipe last. That order reduces scratch risk.
-
Dedicated cloths only for optics. Wash them separately to remove grit.
-
Check filter threads and mount contacts. Remove grit before it migrates.
Clean storage equals fewer surprises on the next assignment.
Lens Protection Equipment and Benefits
Lens Hood Benefits
Lens hoods are underrated. They block stray light and reduce flare. They also add a physical bumper for front elements. I keep hoods on almost always. Petal hoods are compact and effective. Round hoods work well for telephoto primes. In crowded spaces, the hood protects the lens against bumps and fingers. It does real work.
-
Better contrast outdoors by shading the front element.
-
Extra clearance from rain drops and casual contact.
-
Improved handling for some lenses, acting like a grip.
If someone asks about lens hood benefits, I point to fewer smudges and cleaner contrast files. Less cleaning means less risk of micro abrasions.
Clear vs UV Filter Comparison
|
Filter type |
Primary use |
Notes |
|---|---|---|
|
Clear protective |
Physical protection only |
No UV cut. Choose multi-coated glass for minimal flare and reflections. |
|
UV filter |
Physical protection and UV reduction |
Modern sensors handle UV well. The main advantage is protection and easy cleaning. |
Both work for lens protection. I select the best coated option that matches the lens quality. Cheap filters compromise results more than they protect.
Polarising Filter Advantages
A circular polariser enhances skies, cuts glare, and reveals surface detail in foliage and water. It is not primarily a protection tool. Yet it adds a durable glass layer at the front. The trade off is light loss and potential uneven skies on ultra wide lenses. I use it deliberately for image gains, not as a daily protective layer.
-
Rotate to control glare from water, glass, and leaves.
-
Expect about one to two stops of light loss, depending on model.
-
Remove when not needed to maintain consistent exposure and colour.
Keep a polariser in the kit and use it purposefully. Protection is only a side benefit.
Protective Wraps and Skins
Wraps add friction and padding in tight bags. Skins shield barrels against scuffs and improve grip in wet weather. They do not replace cases, but they reduce cosmetic wear. For rental pools and team gear, wraps and skins also help with identification. That small organisational win reduces handling mistakes.
-
Use neoprene wraps to separate lenses in a single compartment.
-
Choose skins with precise cutouts to avoid covering switches and rings.
-
Remove skins for deep cleaning at service intervals.
Surface protection extends working life and preserves resale value. Quiet benefits, steady payoff.
Insurance and Warranties
Physical safeguards reduce risk. They do not eliminate it. I maintain gear insurance that covers accidental damage, theft, and travel. Manufacturer warranties address defects but rarely cover drops or water ingress. Insurance closes that gap. Read exclusions carefully, including unattended vehicle clauses and professional use terms.
-
Keep serial numbers and photos of items for claims.
-
Maintain receipts for filters, cases, and accessories.
-
Review coverage when adding high value lenses to the kit.
Paperwork is not exciting. It is responsible. One incident pays for years of premiums.
Common Damage Prevention Strategies
Beach and Sand Protection
Sand damages lenses fast. It scratches coatings and binds focus rings. I prepare before stepping onto the beach. Caps stay on until the moment of shooting. I use a hood and a UV filter. Lens changes are minimised, preferably done in a sheltered spot. A small towel becomes a working surface, keeping grains off gear.
-
Carry zip bags to quarantine sandy cloths and accessories.
-
Use a blower before any wipe. Sand first, cloth second.
-
Keep the camera in a top loading bag to reduce exposure during swaps.
After the session, I clean thoroughly outside the house or studio. Sand travels everywhere. Control it early.
Rain and Moisture Defence
Rain is workable with preparation. A fitted rain cover keeps controls accessible and the camera dry. I prefer enclosure style covers when rain is steady. A large umbrella assists for static shots, but it occupies a hand. Fewer lens changes mean fewer entry points for water. Microfibre cloths rotate as they get wet.
-
Seal unused ports and viewfinder eyecups. Water sneaks through small gaps.
-
Point the camera downward when moving to shed water.
-
Dry gear at room temperature after the shoot. Avoid heaters and hairdryers.
If water reaches internal glass, professional service is required. Do not delay. Corrosion escalates quickly.
Impact and Drop Prevention
Most drops occur during changes or while moving between locations. I always secure the neck or wrist strap before uncapping. Bags should remain close and closed. Padded compartments absorb shocks. Simple redundancies reduce the chance of a catastrophic fall. Good habits outperform luck.
-
Use quick release straps rated well above gear weight.
-
Attach tripod plates firmly to avoid twisting and sudden slips.
-
Place the camera down before adjusting backpacks or jackets.
UV filters and hoods provide a first line of impact resistance. They are not armour. They are a buffer that often prevents a bad day from becoming worse.
Dust and Debris Management
Dust is persistent. I treat it as a process issue rather than a one time cleaning task. Keep bags clean. Keep lenses capped. Change lenses quickly in low dust zones. Use blowers before contact cleaning. Those simple steps prevent dust from moving deeper into the system where it is harder to remove.
-
Wipe the inside of bags regularly to remove grit.
-
Use protective filters when working in dusty workshops or trails.
-
Clean only when needed to preserve coatings and reduce wear.
In practice, less contact equals fewer micro scratches. Minimalism serves image quality.
Chemical and Liquid Safety
Solvents, sprays, sunscreen, insect repellent, and cleaning fluids can damage coatings and rubber. I keep lenses away from such products. If sunscreen gets on glass, I use a small amount of optical solution and a dedicated cloth. Never mix chemicals. Do not spray near the lens. Apply to the cloth first, then wipe.
-
Store aerosols in a separate pouch, sealed and upright.
-
Use nitrile gloves when handling strong solvents in studio sets.
-
Check manufacturer guidance for compatible cleaning agents.
One careless spray can haze a coating. Prevention is easy. Repair is not.
Securing Your Photography Investment
Every step above serves one aim. Protect optical performance and capital invested in kit. Lens protection is cumulative. Caps and hoods. Filters and cases. Storage and humidity control. Insurance and careful handling. Each layer reduces risk and extends the working life of lenses. I also standardise routines so they become automatic under pressure. That is the difference between theory and a stable practice.
Consider two scenarios. A coastal shoot on a windy day. I pre fit hoods and filters, limit changes, and use a rain cover as a wind shield. I work from a clean towel and bag lenses before leaving the beach. Result. Clean files and no grinding zoom rings. A night city shoot in drizzle. I keep a fitted rain cover and two fresh cloths ready. I bag the camera when moving between spots. Back at the desk, I dry gear at room temperature before storage. Result. No moisture ingress and steady focus performance.
Good habits remove friction and protect the bottom line. They also maintain trust with clients who expect consistent results. I have seen both sides. Careful routines pay for themselves quickly.
Frequently Asked Questions
Does a UV filter really protect my lens?
Yes, as part of a layered approach. A high quality UV filter adds a sacrificial glass layer that takes scratches, salt, and light knocks. It simplifies cleaning and reduces risk to coatings. It also supports lens protection in dusty or wet environments. Choose multi-coated glass and keep it clean.
Can I leave my lens hood on permanently?
In most cases, yes. A hood reduces flare and helps with impact resistance. It also keeps fingers and rain away from the front element. There are exceptions. Some wide angle lenses vignette with certain hoods. In tight bags, a hood may catch on dividers. Assess fit and shooting needs, then decide.
What’s the best humidity level for lens storage?
Target a stable mid range, roughly 40 percent to 50 percent relative humidity. That level reduces fungal risk without over drying rubbers and adhesives. A dry cabinet is ideal. Desiccant packs help if replaced or recharged routinely. Stability matters more than occasional extremes.
Should I remove batteries when storing camera equipment?
Yes for long term storage. Remove batteries to prevent leakage and deep discharge. For short gaps between assignments, I store batteries at partial charge in a cool place. That balances readiness and longevity. Never store gear with a swollen or damaged battery.
How often should I clean my camera lens?
Only when needed. Blow loose dust first, then brush, then wipe with a microfibre cloth. Add lens solution sparingly for oils or smudges. Over cleaning wears coatings and increases scratch risk. Clean before storage if there is visible grime, salt, or moisture.
Is lens insurance worth the investment?
Yes, particularly for professional use or frequent travel. Physical measures reduce risk. Insurance covers residual events such as theft or severe impacts. Review policy exclusions and maintain serial number records. One claim can offset years of premiums, which supports a prudent lens protection strategy.
lens protection lens protection lens protection lens protection lens protection lens protection lens protection lens protection lens protection lens protection
Key takeaways
-
Make lens protection a systematic habit, not a single accessory choice.
-
Use hoods, high quality filters, and padded cases as complementary defences.
-
Prioritise humidity control and clean storage to prevent long term damage.
-
Plan for weather, sand, and transport risks before they appear on set.
-
Backstop safeguards with insurance for complete financial protection.
Final note: Build routines that work under pressure. That is effective lens protection in practice.
uv filter for lens protection, how to store camera lenses, lens hood benefits