


Hip Flexor Exercises for Beginners: Unlock Flexibility and Strength
Dr. Ali Haider Khan
Static stretching alone is often presented as the cure for tight hips. That advice is only half right. I have seen better results when mobility, control, and strength are built together. This guide assembles a clear entry plan. I explain precise technique, safe progressions, and how to link flexibility with strength so gains actually stick. The focus is simple. Use hip flexor exercises as a framework to move, not just to loosen. I will keep the instructions specific and practical. Small wins compound when the work is consistent.
Essential Hip Flexor Exercises for Beginners
1. Standing Hip Marches
I use this as the simplest entry to active control. It builds coordination while warming the hip flexors without stress. Stand tall with feet hip width apart. Brace lightly through the abdomen. March by lifting one knee to hip height, pause, then lower under control.
-
Tempo: 2 seconds up, 1 second pause, 2 seconds down.
-
Sets and reps: 2 to 3 sets of 8 to 12 per side.
-
Support: Hold a wall or chair if balance wavers.
Coaching cues help. Keep the pelvis level and the ribs stacked over the hips. Do not lean back. I add a light band around the feet when more challenge is needed. The band increases demand on the hip flexors and improves control at the top. This is one of the most accessible hip flexor exercises for beginners. It scales well and it feels safe.
2. Seated Leg Lifts
This drill isolates the hip flexors with minimal load. Sit upright on the floor with both legs straight. Place your hands by your sides for support. Lift one straight leg a few inches without leaning back, then slowly lower.
-
Range: Even a small arc is acceptable at first.
-
Sets and reps: 2 to 4 sets of 6 to 10 per side.
-
Progression: Elevate the heel on a book to increase difficulty.
Common faults include rounding the spine or swinging the leg. Keep the torso rigid. The work should concentrate at the front of the hip. I consider this a foundation for hip flexor strengthening exercises where precision matters.
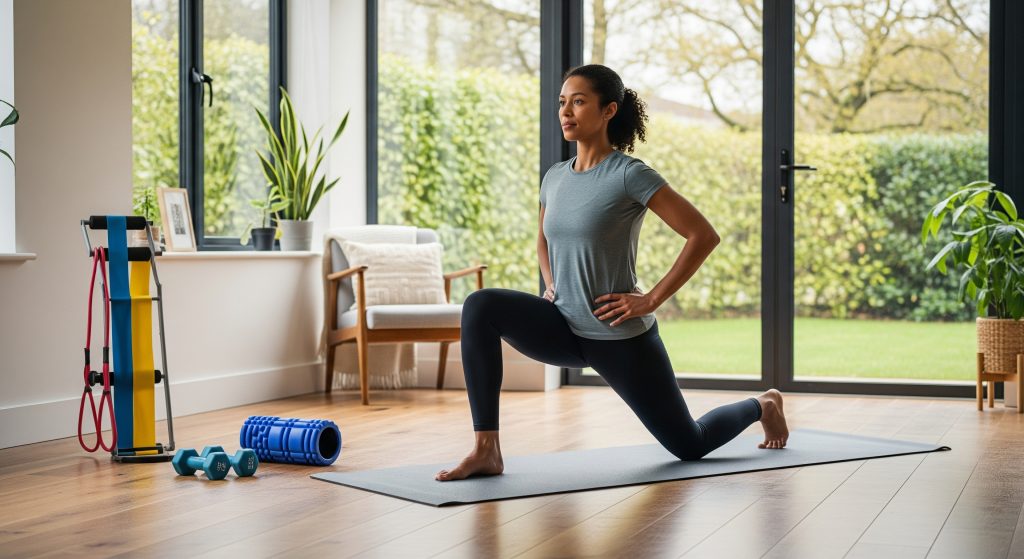
3. Low Lunges
Low lunges serve two goals. They open the front of the hip and they teach control over end range. Step into a long lunge and lower the back knee to the floor. Tuck the pelvis gently and squeeze the back glute. You will feel a front hip stretch on the back leg.
-
Hold: 20 to 40 seconds per side with steady breathing.
-
Active shift: Pulse forward 2 to 3 centimetres without losing the pelvic tuck.
-
Add reach: Lift the arm on the back leg side to bias the psoas.
In practice, I alternate static holds with short active pulses. This approach links flexibility with control. It prepares the joint for more demanding hip flexor exercises for strength.
4. Mountain Climbers
Mountain climbers combine dynamic hip flexion with trunk stability. Set a high plank. Draw one knee toward the chest while keeping the hips level. Alternate legs with smooth control.
-
Cadence: Slow for control or faster for conditioning.
-
Duration: 20 to 40 seconds per set for beginners.
-
Form checks: Neutral spine, quiet shoulders, steady breathing.
Slower speed emphasises stability and end range control. Faster speed builds aerobic capacity and rhythm. Variations like cross-body taps add rotational control. I still prioritise clean movement over speed. Quality first. Power later.
5. Standing Knee Raises
Standing knee raises targeted to a precise height develop stability and balance. Stand tall, brace, and raise one knee to hip level without hiking the opposite hip. Pause, then lower with control.
-
Sets and reps: 3 sets of 8 to 12 per side.
-
Progression: Add an ankle weight or hold a light kettlebell in the opposite hand.
-
Integration: Use in warm ups or cool downs to reinforce patterning.
This is a versatile drill that pairs well with hip flexor stretches. The brief pause at the top prevents momentum from doing the work. It also trains balance, which beginners often lack after long sitting.
6. Bridge Pose Variations
Bridges strengthen the posterior chain, which offsets dominant hip flexors. Lie on your back with knees bent. Press the feet down and lift the hips until the body forms a straight line from shoulders to knees.
-
Basic bridge: 3 sets of 8 to 12 controlled reps.
-
Marching bridge: Lift one knee at the top and hold for 2 seconds. Alternate sides.
-
Single leg bridge: Extend one leg and drive through the planted heel.
Bridges are not hip flexion per se, yet they balance the system. Strong glutes reduce compensations during hip flexor exercises. Balance reduces strain. Control follows.
Hip Flexor Stretches for Improved Flexibility
1. Kneeling Hip Flexor Stretch
From a half kneeling stance, tuck the pelvis and squeeze the back glute. Shift forward slightly until a front hip stretch is felt. Avoid lumbar extension. Keep the ribs quiet.
-
Hold 30 to 45 seconds per side.
-
Repeat 2 to 3 rounds.
-
Option: Reach the back leg side arm overhead for added bias.
Small pelvic adjustments produce a clear difference. Make the tuck deliberate. The stretch should feel in the front of the hip, not the lower back.
2. Pigeon Pose
Pigeon focuses on the external rotators while also easing tension around the hip flexors. Place the front shin angled across the mat and extend the back leg. Keep the pelvis square and the spine long.
-
Hold 30 to 60 seconds per side.
-
Support with blocks if the hips hover above the floor.
-
Back off if the knee feels compressed.
I use this when seated tolerance is low or when rotation is restricted. It pairs well with low lunges to balance front and back tissues.
3. Butterfly Stretch
Sit tall, bring the soles of the feet together, and let the knees drop toward the floor. Hold the feet and lengthen the spine. Breathe into the hips without forcing the range.
-
Hold 45 seconds, repeat twice.
-
Keep a long spine to avoid slumping.
-
Rock gently for active mobility.
This stretch supports abduction flexibility. It reduces groin tightness that can mask hip flexor tension. Simple and effective.
4. Figure-4 Stretch
Lie on your back. Cross one ankle over the opposite knee. Thread your hands behind the grounded leg and draw it toward the chest. Keep the tailbone heavy.
-
Hold 30 to 45 seconds, each side.
-
Option: Perform seated for a different angle.
-
Avoid pulling the crossed knee toward the chest directly.
Figure-4 helps the piriformis and deep rotators. Freeing these tissues often reduces protective tone in the anterior hip. The joint moves better, so hip flexor stretches work better.
5. Couch Stretch
Place one knee on the floor near a wall, with the shin vertical against the wall. Step the opposite foot forward. Tuck the pelvis and rise tall through the torso.
-
Hold 20 to 40 seconds.
-
Ease into position slowly. This stretch can feel intense.
-
Progress by moving the knee closer to the wall.
This position targets the rectus femoris strongly. It is a high yield stretch when performed with careful pelvic control. Start conservative and build patience.
6. Standing Quad Stretch
Stand tall and hold the ankle of the stretching leg. Bring the knees together and tuck the pelvis. Keep the torso upright without leaning forward.
-
Hold 30 seconds, repeat twice per side.
-
Use a wall for steadiness.
-
Do not yank the foot upward with the back arching.
I often place this after low impact hip flexor exercises. The tissue warms first, then adapts. That order usually improves comfort and range.
Hip Flexor Strengthening Exercises for Building Power
Progressive Resistance Training Methods
Strength needs progression and structure. I progress from bodyweight to added load, then to speed. Start with controlled lifts, then increase resistance using ankle weights or cables. Finally, add tempo changes or small range pulses at end range.
-
Loading plan: 5 to 10 percent weekly load increases, if technique remains stable.
-
Rep ranges: 6 to 10 for strength, 10 to 15 for capacity.
-
RPE: Work near 7 of 10 for main sets. RPE is a simple effort scale.
The goal is not fatigue alone. The goal is crisp hip flexion under control. This is how hip flexor exercises for strength produce durable change.
Isometric Hip Flexor Holds
Isometrics build strength with low joint motion. Stand facing a bench and drive one knee into a fixed strap or your hands. Hold the contraction while keeping the spine tall.
-
Work: 15 to 30 seconds on, 30 to 45 seconds off, for 3 to 5 rounds.
-
Effort: Build to a strong but stable hold. Avoid breath holding.
-
Cue: Think tall on the stance leg and still through the trunk.
I also use seated isometric lifts with a yoga block. Press the thigh into the block without moving. It is simple and it targets the specific angle that needs strength.
Resistance Band Exercises
Bands offer smooth resistance where cables are not available. Loop a band around the foot and fix the other end to a sturdy anchor. Stand tall and drive the knee up against the band, pause, then lower slowly.
-
Sets and reps: 3 to 4 sets of 8 to 12 per side.
-
Tempo: 2 seconds up, 2 seconds hold, 3 seconds down.
-
Progression: Step away to increase band tension.
Bands challenge the top of the range, which many neglect. That top range is where gait mechanics and sprint posture live. Useful for runners and field athletes.
Bodyweight Progression Techniques
Bodyweight work scales through leverage and tempo. Start with supported knee raises. Move to unsupported raises. Then to hanging knee raises from a bar, if shoulders allow.
-
Leverage: Shorten the lever by bending the knee. Lengthen by straightening the leg.
-
Tempo: Add 3 second eccentrics to build control.
-
Density: Add mini sets of 3 to 5 reps to increase volume.
These are the core hip flexor strengthening exercises that require no equipment. They work when performed consistently and progressed modestly.
Core Integration Exercises
Hip flexors and trunk stabilisers work together. I integrate hollow holds, dead bugs, and plank knee drives to teach that link. Keep ribs down and pelvis neutral throughout.
-
Hollow hold: 3 sets of 15 to 25 seconds.
-
Dead bug: 3 sets of 6 to 10 controlled reps per side.
-
Plank knee drive: 3 sets of 8 to 12 per side.
This solves a common problem. Strong flexors with a soft trunk pull the spine forward. Integration keeps motion clean and the spine calm.
Hip Flexor Strain Treatment and Recovery Strategies
Immediate Care Protocol
I follow a calm, structured response after a suspected strain. Stop the provoking activity and assess weight bearing. Use relative rest, gentle compression, and position the hip for comfort.
-
First 24 to 48 hours: Reduce load and avoid stretching into pain.
-
Use short, frequent cold applications if swelling or heat is present.
-
Walk within pain free limits. Do not push through sharp pain.
Early restraint protects healing tissue. It also shortens the eventual return to activity. Patience at the start saves time later.
Rest and Activity Modification
Rest must be targeted, not total. Maintain general fitness with non provoking options. Choose cycling with low resistance, pool work, or upper body circuits.
-
Reduce sprinting, kicking, and high step patterns initially.
-
Keep range within mild discomfort, not pain.
-
Reassess symptoms every 48 hours to adjust load.
The aim is to protect tissue while preserving capacity. That balance prevents a long detrain and speeds return.
Therapeutic Stretching Sequence
When pain allows, add gentle hip flexor stretches in a precise order. Start with low intensity holds. Then integrate active end range control.
-
Kneeling hip flexor stretch: 20 to 30 seconds, 2 rounds per side.
-
Standing quad stretch: 20 to 30 seconds, 2 rounds.
-
Low lunge with small pulses: 5 to 8 pulses, 2 rounds.
Keep the pelvis neutral and the glute engaged. I avoid aggressive couch stretching early. It can irritate healing tissue if rushed.
Gradual Return to Exercise
Reintroduce hip flexor exercises with low volume and clear criteria. Pain during and after must stay mild and short lived. Swelling or sharp pain means step back.
|
Phase |
Focus and Criteria |
|---|---|
|
Phase 1 |
Isometrics and marching range. No pain above 3 of 10 and no next day flare. |
|
Phase 2 |
Controlled concentric lifts and bridges. Full daily function without symptoms. |
|
Phase 3 |
Band work and light running drills. Tolerate 24 hours symptom free after sessions. |
|
Phase 4 |
Return to sport actions. Sprinting or kicking progressed by distance and speed. |
I keep a simple log during this stage. Noting pain ratings and volume clarifies the next step. It also prevents guesswork.
Prevention Techniques
Prevention hinges on capacity and rhythm. Train the hip flexors two to three times per week. Balance flexion work with posterior chain strength and trunk stability.
-
Warm up with marching, low lunges, and core bracing.
-
Progress loads by small weekly steps and test single leg control.
-
Monitor sitting time and break it up every 30 to 45 minutes.
Most strains reflect gaps in preparation and recovery. Fill the gaps with steady practice and modest progressions. Simple habits pay off.
Mastering Hip Flexor Health Through Consistent Practice
Results come from a clear plan, not a single stretch. I build sessions around a short flow. Mobilise, activate, then strengthen. Hip flexor exercises set the theme, while posterior chain and core offer balance. The sequence is predictable and effective. Warm up with marching or low lunges. Add one focused strength drill and one control drill. Finish with brief hip flexor stretches and easy breathing.
The method is not glamorous. It works. Consistency beats intensity for beginners. Keep the plan simple and your hips will respond.
Frequently Asked Questions
How often should beginners perform hip flexor exercises?
I recommend two to three sessions per week for beginners. This frequency allows practice without excessive soreness. Place at least one rest day between sessions at first. Add a brief mobility circuit on off days if desired. Keep the total weekly volume modest and repeatable.
Can tight hip flexors cause lower back pain?
Tight hip flexors may contribute to lower back discomfort, especially with prolonged sitting. They can pull the pelvis forward and stress the lumbar spine. The effect varies among people, and other factors often contribute. A balanced plan of hip flexor stretches, glute strength, and trunk control tends to reduce symptoms.
What are signs of weak hip flexors?
Common signs include difficulty raising the knee against resistance, poor sprint mechanics, and early fatigue during climbs. Visible trunk lean during marching or knee raises is another indicator. Hip flexor strengthening exercises that improve control at the top range usually correct these patterns.
How long does it take to improve hip flexor flexibility?
Meaningful changes often appear within four to six weeks, assuming practice two to three times per week. Gains arrive sooner when strength supports the new range. Results vary with training history and daily habits. Consistency and modest progress are decisive.
Should I exercise with hip flexor pain?
Light movement is acceptable if pain is mild and settles within 24 hours. Avoid drills that provoke sharp pain or cause limping. Sub in isometrics or range limited options until symptoms improve. If pain persists or worsens, I advise a clinical assessment.
Which hip flexor exercises are safe during pregnancy?
Many low load options remain safe when cleared by a clinician. Standing hip marches, gentle knee raises, and low lunges with support are common choices. Avoid long periods lying supine in later stages. Prioritise comfort, balance support, and controlled breathing.
Additional semantic reinforcement: hip flexor exercises, hip flexor exercises, hip flexor exercises, hip flexor stretches, hip flexor strengthening exercises, hip flexor exercises for strength, hip flexor strain treatment.