


What Are the Safest Slipped Disc Exercises to Start With?
Dr. Vishal Nigam
Rest alone is often recommended after a disc injury. It rarely solves the problem by itself. Movement does. The right Slipped Disc Exercises calm symptoms, restore confidence, and build the spinal strength needed for daily life. This guide outlines safe starting moves, practical precautions, and a phased routine that you can implement with professional oversight. It is deliberately conservative, evidence-aware, and focused on what works in practice.
Top Safe Slipped Disc Exercises for Beginners
1. Pelvic Tilts
Pelvic tilts are a foundation move for Slipped Disc Exercises because they teach you to engage the deep abdominals without stressing the spine. As Mayo Clinic notes, the basic setup is supine with knees bent, gently flattening your lower back by bracing the abdomen. This improves core control and lumbar alignment.
-
Set up: Lie on your back, knees bent, feet hip-width. Breathe in.
-
Action: Exhale, brace gently, and tilt your pelvis to imprint the lower back. Hold 3 to 5 seconds.
-
Reps: 8 to 12 slow repetitions, 1 to 2 sets.
Keep the movement small. No pushing through pain. Progressions include seated and hands-and-knees tilts to add variety. If the tilt increases symptoms, reduce the range or pause the exercise. As Low Back Pain Response to Pelvic Tilt Position reports, response can vary with baseline pain, so adjust volume cautiously.
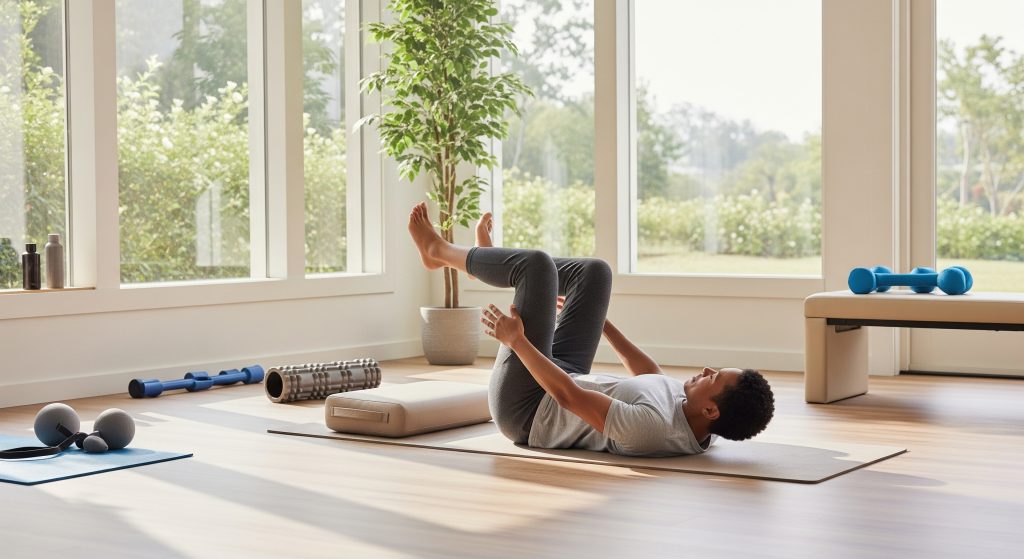
2. Knee to Chest Stretches
This gentle flexion stretch can relieve stiffness and ease protective muscle spasm. As Williams Back Exercises – StatPearls – NCBI Bookshelf – NIH describes, the single knee-to-chest is part of a flexion series used clinically for lower back pain to mobilise the lumbar spine and improve comfort.
-
Set up: Lie on your back. Bring one knee towards the chest with hands behind the thigh.
-
Action: Hold 15 to 20 seconds, breathing slowly. Switch sides.
-
Reps: 3 to 5 holds each side.
If both knees to chest are comfortable, you can try a gentle double-knee version. Keep the pull light and avoid bouncing. This stretch fits well in early Slipped Disc Exercises if extension positions are provocative.
3. Cat-Cow Stretch
Cat-cow builds controlled mobility through the whole spine and reduces guarding. As Pain Neuroscience Education and Motor Control Exercises highlights, this pattern activates stabilisers such as the multifidus and can improve flexibility in people with long-standing low back pain.
-
Set up: Hands under shoulders, knees under hips.
-
Action: Exhale to round the back (cat). Inhale to gently lift chest and lengthen the spine (cow).
-
Reps: 6 to 10 slow cycles, staying within a symptom-free range.
Move smoothly. Avoid deep sagging. This is a low-load entry in Slipped Disc Exercises that also rehearses your breathing rhythm and neutral spine awareness.
4. Bird Dog Exercise
Bird dog builds anti-rotation control and is ideal as a first step towards core endurance. It is one of the safest back strengthening exercises when performed with a neutral spine.
-
Set up: Hands-and-knees, ribs stacked over pelvis.
-
Action: Slide one leg back and the opposite arm forward. Hold 3 to 5 seconds. Return and switch.
-
Reps: 6 to 8 each side. Stop if the low back sags or rotates.
Think long, not high. If balance is challenging, start with only the legs, then only the arms. This move slots naturally into beginner Slipped Disc Exercises because it trains the deep trunk without compression spikes.
5. Partial Crunches
Partial crunches strengthen the abdominal wall with less load than full sit-ups. As OrthopedicNJ explains, keeping the knees bent and lifting only the head and shoulders reduces strain on the lumbar segments while still engaging the rectus and obliques.
-
Set up: Lie on your back, knees bent, hands by temples or across chest.
-
Action: Exhale, brace, then curl the head and shoulder blades off the floor. Pause, lower slowly.
-
Reps: 8 to 12 controlled reps, 1 to 2 sets.
Avoid pulling the neck. If symptoms flare, substitute with isometric holds such as a hollow brace. Partial crunches can complement other Slipped Disc Exercises to build tolerance to daily tasks.
6. Wall Sits
Wall sits provide isometric strength for the legs while your back remains supported. As ISSA notes, they train quadriceps, glutes, and core stability when performed with a flat back against the wall and knees near 90 degrees.
-
Set up: Back to the wall, feet forward, slide to a comfortable depth.
-
Action: Hold 20 to 45 seconds with steady breathing. Rise slowly.
-
Sets: 2 to 3, with 45 to 60 seconds rest.
Keep the tailbone and ribcage on the wall. This builds tolerance for sitting and standing transitions. It is a practical addition to Slipped Disc Exercises because it challenges endurance without trunk flexion.
7. Hamstring Stretches
Tight hamstrings increase posterior pelvic tilt and can stress the lower back. Gentle lengthening reduces tug on the lumbar area and improves gait.
-
Supine strap stretch: Loop a belt around the mid-foot. Knee slightly bent.
-
Action: Raise the leg until a mild stretch in the back of the thigh. Hold 20 to 30 seconds.
-
Reps: 3 to 4 each side. Avoid aggressive pulls that reproduce nerve pain.
Maintain a neutral spine. Choose positions that do not provoke symptoms. These are low-risk add-ons to Slipped Disc Exercises that support daily mobility.
8. Prone Press-Ups
Press-ups in prone are widely used to centralise leg pain and allow extension tolerance. As Spine-health observes, centralisation draws pain from the leg back into the lower back, which generally indicates improvement.
-
Set up: Lie face down, hands under shoulders.
-
Action: Press the chest up while hips stay on the floor. Pause 1 to 2 seconds. Lower.
-
Reps: 6 to 10, keeping the neck relaxed and shoulders down.
Stop if leg symptoms worsen or travel further down. As A PHASED REHABILITATION PROTOCOL FOR ATHLETES notes, prone extension is useful in disc protocols when introduced with careful symptom monitoring. It is a mainstay within many Slipped Disc Exercises programmes.
9. Dead Bug Exercise
Dead bug is a reliable entry in core stability exercises because it trains bracing and limb control without spinal shear. As Harvard Health highlights, it activates the deep trunk muscles, including the transversus abdominis, and can be modified for all levels.
-
Set up: Lie on your back. Hips and knees at 90 degrees. Arms up.
-
Action: Brace. Lower one heel to the floor and the opposite arm overhead. Return and switch.
-
Reps: 6 to 10 each side. Keep ribs down and back neutral.
If you lose control, shorten the lever by tapping the heel closer to the hips. Dead bug often becomes the anchor of Slipped Disc Exercises because it teaches predictable, repeatable trunk control.
10. Bridge Exercise
Bridges strengthen the glutes, which protect the lumbar spine by sharing load. As The effectiveness of a simplified core stabilization program reports, targeted core work like bridging improves disability scores in people with persistent back pain.
-
Set up: Supine, knees bent, feet hip-width, arms by sides.
-
Action: Exhale, brace, and lift the hips to a straight line from shoulders to knees. Pause, lower slowly.
-
Reps: 8 to 12, 2 sets. Emphasise glute squeeze, not low-back arching.
Adjust foot position to find the strongest glute contraction. This is one of the best exercises for herniated disc recovery once early pain settles, and it complements other Slipped Disc Exercises by building posterior chain capacity.
Essential Guidelines and Precautions for Herniated Disc Exercises
Movements to Avoid Completely
Certain patterns risk aggravating the disc early on. As A PHASED REHABILITATION PROTOCOL FOR ATHLETES details, avoid heavy spinal flexion, end-range rotation, and loaded bending during the acute phase. High-load lifts like heavy squats and deadlifts place substantial compressive and shear forces on the lumbar segments.
-
Skip sit-ups and Russian twists.
-
Avoid high-impact drills and deep forward bending under load.
-
Limit long periods of sitting that stiffen the spine.
As Spine-health blog notes, traditional crunches and twisting variations increase disc pressure. These exclusions are temporary. They allow herniated disc exercises to deliver benefit without competing irritation.
Warning Signs to Stop Exercising
Your rule is simple. Pain that spreads further down the leg, new numbness, or weakness means stop. As Slipped disc – Non-surgical treatment options states, red flags include bowel or bladder changes and escalating neurological symptoms. These require urgent medical assessment.
-
Sharp, worsening pain that does not settle with rest.
-
Increasing tingling or loss of strength.
-
Any change in continence or saddle numbness.
If pain remains high despite reduced activity for several days, seek review. As Management of Lumbar Disc Herniation: A Systematic Review notes, exercise should not override basic function. If symptoms block normal tasks, step back and reassess.
Proper Breathing Techniques
Breathing is not decoration. It stabilises your trunk and regulates nervous system tone. As Brisbane Spine Clinic explains, diaphragmatic breathing increases intra-abdominal pressure to support the spine and reduce pain.
-
Inhale through the nose, expanding the abdomen and lower ribs.
-
Exhale slowly through pursed lips. Maintain light abdominal tension.
-
Pair exhales with the exertion phase of each exercise.
Breathing also downshifts stress, which, depending on the source, can reduce pain sensitivity. As Breathing Practices for Stress and Anxiety Reduction suggests, slow, structured patterns improve physical and mental outcomes. Slipped Disc Exercises work better when the breath is disciplined.
Importance of Neutral Spine Position
Neutral spine is the stacked alignment of your natural curves. It is basically the default that minimises joint stress. As A PHASED REHABILITATION PROTOCOL FOR ATHLETES notes, neutral reduces aggravation during rehabilitation and enhances movement efficiency.
-
Find it in supine: small space under the low back, ribs down.
-
Maintain it in quadruped: long neck, level pelvis, quiet ribs.
-
Carry it into standing: weight evenly distributed, glutes lightly engaged.
Mastering neutral gives you a transferable reference for Slipped Disc Exercises, lifts, and daily activities. It is also a simple way to feel control returning.
When to Consult a Physiotherapist
Professional input accelerates recovery and prevents unhelpful patterns. As Hospital for Special Surgery advises, seek a physiotherapist if severe pain persists, daily activities are limited, or neurological signs appear.
-
Symptoms radiate into the leg or arm and do not settle.
-
Sleep is interrupted by pain despite basic measures.
-
Progress stalls after 2 to 3 weeks of consistent practice.
Expect a tailored plan that adjusts exercise selection, dosage, and progression. This makes your herniated disc exercises safer and more effective.
Building Your Daily Exercise Routine for Disc Recovery
Week 1-2 Gentle Mobilisation Phase
The first fortnight focuses on quieting symptoms and restoring controlled movement. As A PHASED REHABILITATION PROTOCOL FOR ATHLETES… outlines, prioritise non-rotational, non-flexion patterns if the leg is irritable. Keep intensity low and volume modest.
-
Daily: Pelvic tilts, knee-to-chest (if tolerated), cat-cow, short walks.
-
Optional: Gentle prone press-ups if leg symptoms centralise.
-
Breathing: 5 minutes of diaphragmatic practice.
As Clinical efficacy of exercise therapy for lumbar disc herniation reports, structured exercise improves pain and function versus inactivity. Keep sessions short and consistent. Slipped Disc Exercises in this phase should feel easy to moderate, not heroic.
Week 3-4 Core Stability Phase
Once symptoms settle, increase stability demands. The goal is better endurance, not maximal strength. Progress bird dog and dead bug, and add light bridges. Maintain mobility with cat-cow and hamstring work.
-
3 to 4 days per week: Dead bug, bird dog, bridges, wall sits.
-
Daily: Short mobility routine, breathing practice.
-
Walking or gentle cycling for 15 to 20 minutes.
Here is why this matters. Your spine needs time under tension with perfect form to build resilience. Slipped Disc Exercises in this phase create that base with minimal risk.
Week 5-8 Strength Building Phase
Now build capacity with careful progressions. As A Systematic Review of the Effectiveness of Core Stability Exercises indicates, core-focused programmes reduce pain and improve function in low back pain populations.
-
Progress bridges to single-leg holds as tolerated.
-
Advance dead bug with longer levers or tempo slows.
-
Introduce hip hinges with a dowel to rehearse neutral spine.
Volume increases gradually. Add one variable at a time and maintain symptom-free ranges. These Slipped Disc Exercises prepare you for higher-demand tasks and reduce the chance of flare-ups.
Frequency and Duration Guidelines
Consistency beats intensity. As Clinical effects and biological mechanisms of exercise on lumbar disc herniation notes, programmes longer than two weeks produce meaningful symptom reduction. For most, three sessions per week at 15 to 30 minutes each is a practical baseline.
|
Parameter |
Guideline |
|---|---|
|
Sessions per week |
3 to 5 for Slipped Disc Exercises |
|
Session length |
15 to 30 minutes focused work |
|
Daily mobility |
5 to 10 minutes light movement |
|
Aerobic work |
15 to 25 minutes low impact, 3 days |
As Exercise prescription for improving chronic low back pain suggests, longer interventions tend to deliver better outcomes. Small, regular inputs compound. That is the point.
Tracking Progress Safely
Track what matters: pain location, morning stiffness, and function. As A PHASED REHABILITATION PROTOCOL FOR ATHLETES … reminds us, recovery moves through acute, repair, and remodelling stages. Your metrics should evolve with each phase.
-
Daily: 0 to 10 pain rating, first 10 steps stiffness, most challenging task completed.
-
Weekly: Exercise volume, holds, and perceived effort.
-
Milestones: Less leg pain, longer walks, improved sleep continuity.
Higher adherence often correlates with better outcomes, as Mobile-Based Digital Rehabilitation Program for Patients … reports. A simple log or app keeps you honest and supports sensible progress within your Slipped Disc Exercises plan.
Combining Exercises with Daily Activities
Movement during the day cements the gains from your session. As Slipped disc – Non-surgical treatment options – NCBI – NIH notes, active management is superior to prolonged rest for most cases.
-
Short walks between meetings rather than long sitting blocks.
-
Hip hinge mechanics for picking items up, even if they are light.
-
Breaks every 30 to 45 minutes to reset posture and breathe.
Low-impact aerobic choices such as walking or swimming slot in well. Slipped Disc Exercises do the focused work, and daily habits protect the result.
Taking the First Step Towards Recovery
Start small and stay consistent. Choose three Slipped Disc Exercises that feel safe today and practise them every other day for two weeks. It is basically a simple contract with yourself. If symptoms stay stable or improve, progress a single variable. If they flare, scale back and reassess position, breath, and range. Seek professional guidance when needed. Progress follows good decisions repeated often.
Frequently Asked Questions
How soon after a slipped disc diagnosis can I start exercising?
In most cases, gentle Slipped Disc Exercises can begin within a few days of diagnosis once severe pain is stabilised. Early movement supports circulation and reduces stiffness. Begin with low-load options such as pelvic tilts, cat-cow, and short walks. If pain radiates strongly or neurological signs are present, obtain clinical clearance first. The objective is calm mobility, not fatigue.
Which core stability exercises are most effective for herniated disc recovery?
Dead bug, bird dog, and bridges form a reliable trio. These core stability exercises challenge the trunk without excessive compression or rotation. Add wall sits to build endurance in the legs while maintaining a supported back. Together, these choices underpin most herniated disc exercises with strong adherence and low risk.
Can I do yoga with a slipped disc?
Yes, with modification and professional input. Prioritise poses that maintain neutral spine and avoid deep flexion or end-range twists. Cat-cow, supported sphinx, and gentle hamstring work are common entries. Avoid aggressive forward folds and strong rotations early on. If a pose centralises symptoms and feels stable, it is likely acceptable to keep in your Slipped Disc Exercises toolkit.
How many repetitions should I do for back strengthening exercises?
Favour low to moderate volume with strict form. Use 8 to 12 repetitions for dynamic moves like partial crunches and bridges. Hold 20 to 45 seconds for isometrics like wall sits. Start with 1 to 2 sets and build to 2 to 3 across weeks. The better guide is quality: stop a set if form slips or symptoms appear.
What’s the difference between acute and chronic herniated disc exercises?
Acute programmes emphasise pain control, gentle mobility, and neutral spine control. Chronic phases shift toward endurance and progressive strengthening. In the acute window, avoid heavy flexion and twisting. In the chronic stage, gradually increase load and complexity. The movements can look similar, but the dosage and tempo change.
Should I feel pain whilst doing these exercises?
Expect mild effort or stretch, not pain. A small, local ache that fades quickly is acceptable to an extent. Pain that sharpens, radiates, or lingers is a stop signal. Adjust range, decrease load, or substitute a different Slipped Disc Exercises variant. If pain persists across sessions, consult a physiotherapist.
How long before I see improvement from these exercises?
Roughly speaking, many notice early gains in 2 to 3 weeks, especially in stiffness and confidence. More substantial changes in function tend to appear across 6 to 8 weeks with regular practice. Progress is not perfectly linear. Track small wins and keep the basics tight: neutral spine, controlled range, steady breath. That is how momentum builds.
Quick Reference: Slipped Disc Exercises Starter Set
|
Exercise |
Primary purpose |
|---|---|
|
Pelvic tilt |
Core activation, lumbar alignment |
|
Knee-to-chest |
Gentle flexion mobility |
|
Cat-cow |
Segmental control and mobility |
|
Bird dog |
Anti-rotation trunk control |
|
Dead bug |
Deep core endurance |
|
Bridge |
Glute strength, posterior chain support |
|
Wall sit |
Isometric leg and core endurance |
Final note. Choose fewer exercises and execute them perfectly. Then add complexity. That is how Slipped Disc Exercises turn from a checklist into recovery.