


What Are the Best Shoulder Pain Exercises for Fast Relief?
Dr. Rajeev K Sharma
Rest alone rarely solves shoulder pain. Strategic movement does. The right Shoulder Pain Exercises reduce irritation, restore motion, and rebuild strength. This guide sets out practical drills you can use today and a structured plan to progress safely. The emphasis is simple. Pain down, function up, and confidence back.
Top Shoulder Pain Exercises for Immediate Relief
1. Pendulum Swings
Pendulum swings offer gentle motion with minimal load. You let the arm hang and move your body to create the swing. This keeps the shoulder passive and calm.
As NewYork-Presbyterian notes, pendulums increase shoulder flexibility, support range of motion, and reduce pain when performed as passive movement. In practice, stand with your uninjured hand supported on a table. Hinge forward slightly. Let the affected arm hang. Shift your hips to draw small circles, then side to side. Keep it slow and smooth.
-
Time: 5 to 10 minutes.
-
Frequency: 3 times daily during flare-ups.
-
Directions: Circles, forward and back, side to side.
As Saint Luke’s Health System explains, the goal is fluid movement without pain spikes. The motion enhances blood flow and reduces stiffness. For frozen shoulder, gentle pendulums help you reclaim motion gradually. As Harvard Health highlights, this drill is a reliable early step that protects irritated tissue.
2. Cross-Body Shoulder Stretch
This stretch eases the back of the shoulder and improves internal rotation. You target the posterior deltoid and rotator cuff. Keep the shoulder blade set down and back.
As BMC Musculoskeletal Disorders reports, a modified cross-body stretch can reduce pain and dysfunction in subacromial impingement. Extend your arm across your chest. Use the other hand to draw the arm closer. Hold a steady, comfortable stretch.
-
Hold: 20 to 30 seconds.
-
Sets: 3 per side.
-
Breathing: Slow, even breaths.
As YourHouseFitness notes, you target infraspinatus and teres minor while improving control. For overhead athletes, correct modification matters. As JOSPT recommends, modified techniques protect against impingement risk while restoring motion.
3. Doorway Chest Stretch
Pectoral tightness drags the shoulder forward and narrows space in the joint. The doorway stretch counters that posture and frees the shoulder blade.
In a controlled study, Journal of Physical Therapy Science found the doorway stretch increased pectoralis minor length and internal rotation range, with improved scapular position. Stand in a doorway. Place your forearms on the frame at shoulder height. Step forward until you feel a gentle stretch across the chest.
-
Hold: 20 to 30 seconds.
-
Sets: 2 to 3.
-
Angle: Adjust arm height to vary the stretch.
As Rehab Hero notes, this targets pectoralis major, pectoralis minor, and the anterior deltoid. Expect better posture and less anterior shoulder pressure. Small change, meaningful result.
4. Wall Slides
Wall slides coordinate the shoulder blade and strengthen support muscles. They are low load and highly effective for posture and pain control.
As Journal of Physical Therapy Science reports, wall slides improve scapular alignment and pain in patients with downward rotation patterns after several weeks. A broader review indicates that consistent scapular work lifts function and reduces symptoms. As Archives of Rehabilitation Research and Clinical Translation summarises, programmes of at least six weeks show clear benefit.
Stand with your back to a wall. Place forearms and hands on the wall in a W position. Slide your arms up to a Y. Maintain light pressure and keep ribs down.
-
Reps: 8 to 12.
-
Sets: 2 to 3.
-
Tempo: Smooth up and controlled down.
As Journal of Human Kinetics notes, wall slides activate serratus anterior and lower trapezius, critical for shoulder mechanics. You can adjust range to match comfort. As Hinge Health suggests, this makes them accessible across fitness levels and pain states.
5. Shoulder Blade Squeezes
Scapular squeezes teach mid back engagement without flaring the ribs. The cue is simple. Pull the shoulder blades gently together and down, then release.
As Hinge Health explains, this strengthens the muscles between the shoulder blades and reduces neck tension. As Ortho Specialists of Idaho advise, improved scapular control supports shoulder stability and pain relief.
-
Reps: 10 to 15.
-
Sets: 2.
-
Cadence: Hold each squeeze for 3 seconds.
6. Towel Internal Rotation
This assisted stretch restores the behind-the-back reach. You use a towel as a gentle lever to guide motion.
As Shoulder and Elbow Clinic notes, towel internal rotation is a mainstay for frozen shoulder and post-operative care. Hold a towel behind your back with the affected hand low. Pull upward gently with the other hand until a mild stretch appears. Do not crank the joint.
-
Hold: 20 seconds.
-
Reps: 5.
-
Frequency: Daily during stiffness phases.
As Peak Physio outlines, the aim is to restore flexibility in tight tissues. Technique consistency beats force. As CommonSpirit advises, vary the angle slightly and hold at a comfortable limit for best results.
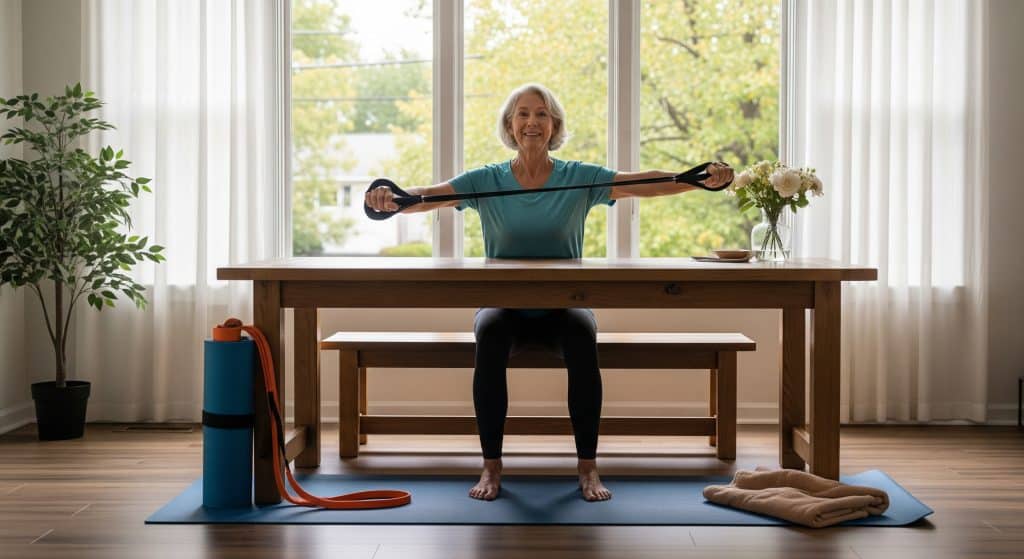
7. External Rotation with Resistance Band
External rotation strengthens the posterior rotator cuff. It is central to Shoulder Pain Exercises that protect long term function.
Anchor a light band at elbow height. Keep your elbow tucked at your side with a towel roll. Rotate the hand outward while keeping the elbow still. Control the return.
-
Reps: 10 to 15.
-
Sets: 2 to 3.
-
Effort: Mild fatigue but no sharp pain.
This drill supports joint centration and reduces irritation in daily tasks. It also sets the base for later overhead work.
Targeted Exercises for Specific Shoulder Conditions
Shoulder Impingement Exercises
For impingement, you combine mobility, scapular control, and cuff strength. This blend restores space and improves mechanics.
As BMC Musculoskelet Disord reports, manual therapy plus stretching and strengthening improved pain and function in a controlled trial. A protocol approach works. As J Orthop Sports Phys Ther noted, structured programmes over roughly twelve weeks deliver meaningful improvements.
-
Mobility: Cross-body stretch, doorway chest stretch.
-
Scapular control: Wall slides, scapular squeezes.
-
Cuff strength: Band external rotation, isometric internal rotation.
As Shape and Strength outlines, wall angels, cuff work, and posterior stretches address the common deficits. For home strength, use isometrics and side lying external rotation. As Hospital for Special Surgery recommends, add scaption raises in the pain free arc to consolidate control.
Label this as shoulder impingement exercises in your plan so you keep the intent specific and measurable.
Frozen Shoulder Exercises
Frozen shoulder has phases. Your exercises should match irritability and night pain. The rule is move often, without provoking flares.
As Physical Therapy Reviews notes, physical therapy is central across stages. Early on, pendulums and gentle towel stretches are preferred. As Journal of Bodywork and Movement Therapies suggests, PNF methods can improve range and function in later phases.
-
Pain dominant phase: Pendulum swings, short holds, frequent sets.
-
Stiffness dominant phase: Towel internal rotation, cross body stretch.
-
Recovery phase: Add light bands and wall slides.
As World Journal of Orthopedics details, home programmes improve outcomes when tailored to stage and tolerance. As Hospital for Special Surgery notes, frequent short sessions work well. You might perform pendulums and towel stretches 10 to 20 times daily in brief bursts. These are your frozen shoulder exercises when stiffness leads the problem.
Rotator Cuff Injury Rehabilitation
Rotator cuff care needs graded loading and precise technique. You protect the tendon while steadily increasing capacity.
Begin with isometrics if pain is high. Push gently into the band without moving the arm. Then progress to external rotation, scapular work, and controlled scaption raises. Keep the arm in a safe arc.
-
Phase 1: Isometrics at low effort. Pain under 4 out of 10.
-
Phase 2: Band external rotation, prone rows, wall slides.
-
Phase 3: Scaption raises, higher resistance, tempo control.
These are classic exercises for rotator cuff injury because they load the tissue without provocation. Increase only one variable at a time. Either reps or resistance, not both.
Shoulder Strengthening Exercises for Prevention
Prevention is simple in design and powerful in effect. Two days per week is normally enough once symptoms settle.
-
Posterior chain: Band external rotation, prone Y and T holds.
-
Scapular control: Wall slides, serratus punches.
-
Mobility pairing: Doorway stretch and cross body stretch post session.
These shoulder strengthening exercises maintain balance across the joint. They also help you tolerate overhead work with less risk.
Proper Form and Safety Guidelines
Warming Up Before Shoulder Exercises
Begin with heat or a warm shower if stiffness is prominent. Then use gentle range drills. About 5 minutes of pendulums and shoulder circles prepare tissue and reduce apprehension.
-
Sequence: Light cardio, pendulums, easy wall slides.
-
Goal: Warmth, not fatigue.
-
Check: Pain below 4 out of 10 during movement.
A short warm up improves coordination and reduces guarding. It also sharpens your movement quality for the work ahead.
Common Mistakes to Avoid
Rushing reps and compensating with the neck are common pitfalls. So is jumping to heavy loads too soon.
As Mayo Clinic emphasises, poor lifting technique raises injury risk significantly. Balance pressing with pulling. As SQUATWOLF cautions, overworking the front deltoid creates imbalance that invites impingement and tendinitis.
-
Do not shrug during raises. Keep the neck relaxed.
-
Do not push into sharp pain. Adjust range or load.
-
Do not skip pulling work. Prioritise scapular control.
When to Stop Exercising
Pain is information. Use it. If pain is sharp or persists after stopping, cease the drill and reassess technique.
As WHO guidance states, persistent or sharp pain may indicate injury and warrants stopping. Overhead pain can flag impingement or tissue irritation. As Business Insider reported, it is prudent to halt and evaluate mechanics when discomfort appears with pressing overhead.
As Continuous Motion PT notes, pain that lingers for weeks needs clinical input. Keep pain under 5 on a 0 to 10 scale during rehab sessions. As Baylor Scott & White Health suggests, this threshold helps you train safely while symptoms settle.
Modifications for Different Pain Levels
Match the exercise to your current irritability. In high pain days, use isometrics, pendulums, and short holds. On stable days, expand range and add light resistance.
-
High pain: Pendulums, towel stretch, scapular squeezes.
-
Moderate pain: Wall slides, band rotations with tiny ranges.
-
Low pain: Full range strength and controlled tempo work.
Small levers matter. Decrease the arm lever length, reduce speed, or change the range to keep pain within limits. That is sensible progression.
Creating Your Shoulder Recovery Programme
Weekly Exercise Schedule
Consistency beats intensity in rehabilitation. Short, frequent sessions produce better results than occasional hard efforts.
As BMC Musculoskeletal Disorders reported for office workers, twice-daily neck and shoulder sessions over 4 weeks improved pain and function. For shoulder rehab, aim for at least five days weekly. Keep sessions brief and focused.
|
Day |
Plan |
|---|---|
|
Mon |
Pendulums, cross-body stretch, band external rotation. |
|
Tue |
Doorway stretch, wall slides, scapular squeezes. |
|
Wed |
Active recovery: light pendulums and breathing drills. |
|
Thu |
Pendulums, towel internal rotation, band external rotation. |
|
Fri |
Doorway stretch, wall slides, scaption to shoulder height. |
|
Sat |
Optional: gentle mobility and posture resets. |
|
Sun |
Rest or a brief walk plus pendulums if stiff. |
For athletic cases, progressive resistive work is appropriate after the acute phase. As Asia-Pacific Journal of Sports Medicine outlines, a six week progression using bands and weights restores strength and range after dislocation. The principle holds for non-traumatic pain, though loads remain lighter.
Progressive Difficulty Levels
Progress needs structure and checkpoints. Increase difficulty based on criteria, not guesswork.
As PLOS ONE shows, a criteria-based programme for rotator cuff related pain reduced symptoms within 6 weeks and continued improving through 26 weeks. The GRASP trial reinforces a progressive approach. As NIHR summarises, strengthening the posterior cuff and loading the shoulder in stages aligns with clinical guidance and patient feedback.
-
Level 1: Pain under 4/10, basic mobility, isometrics.
-
Level 2: Stable sleep, larger range, light bands.
-
Level 3: Full range strength, slow eccentrics, task specific drills.
As Frontiers in Bioengineering and Biotechnology notes, varied modes that target the rotator cuff improve stabilisation and pain to a meaningful extent. Treatment guidelines concur. As Standard Treatment Guidelines emphasise, a tailored, progressively challenging plan is essential.
Templates help, but personalisation wins. As Mayo Clinic advocates, use progressive resistance with modalities that match your status. As AAOS advises, link progressions to specific goals and address any muscle imbalance early.
Combining Stretching and Strengthening
Stretching buys you motion. Strength protects the motion you gain. The combination is the engine of recovery.
-
Pair doorways with wall slides. Open the chest, then coordinate the blade.
-
Follow cross-body holds with band external rotation. Mobilise, then stabilise.
-
Use pendulums before strength sets on stiff days to reduce guarding.
Alternate days can favour mobility or strength. Or combine them in short supersets with modest rest. Choose what keeps pain predictable and progress measurable.
Tracking Your Progress
Track three items weekly. Pain, range, and function. Keep it brief and objective.
-
Pain: Average daily pain and worst pain. Aim for a downward trend.
-
Range: Fingertip reach behind back and overhead range. Note small gains.
-
Function: Sleep quality and two tasks you care about, like carrying or reaching.
If pain is flat but function climbs, you are still winning. If both regress for 2 weeks, adjust the plan or seek a clinical review.
Conclusion
Effective Shoulder Pain Exercises follow a simple logic. Calm the joint with gentle motion. Rebuild control around the shoulder blade. Then load the rotator cuff with steady, criteria based progress. You address pain, mechanics, and capacity in that order. And yet, the plan remains personal. Match the dose to your day, not a perfect template. Consistency and small wins compound into lasting change.
Frequently Asked Questions
How often should I perform shoulder pain exercises?
Frequency depends on irritability and goals. Mobility drills like pendulums and cross body stretches can be done 1 to 3 times daily in short sets. Strength work fits well on 3 days per week with a rest day between. Keep pain under 4 to 5 out of 10 during sessions. Shoulder Pain Exercises work best with frequent, tolerable practice.
Can shoulder exercises make my pain worse?
Yes, if the load, range, or speed exceeds your current capacity. Reduce range, slow the tempo, or choose an easier variation. Stop if pain is sharp or lingers after exercise. Resume with a lighter option once symptoms settle. This measured approach keeps progress safe.
How long before I see improvement from shoulder exercises?
Early changes often appear within 2 to 3 weeks, particularly in pain and confidence. Strength and full range improvements usually require 6 to 12 weeks of consistent work. Tissue capacity adapts gradually. Keep the criteria based progressions steady.
Should I use ice or heat with shoulder exercises?
Use heat before sessions to reduce stiffness and improve comfort. Use ice after sessions if soreness is reactive. Either option is supportive, not curative. Choose the method that helps you complete your plan with less irritability.
When should I seek professional help for shoulder pain?
Seek help if pain disrupts sleep for more than 2 weeks, strength drops suddenly, or you cannot lift the arm. Also seek review if no improvement appears after 4 to 6 weeks of structured work. A clinician can refine diagnosis and loading strategy.
Can I do shoulder exercises if I have arthritis?
Yes. Controlled movement and light strengthening support joint health and pain control. Use shorter ranges on flare days and avoid long holds if they aggravate the joint. Build tolerance slowly with predictable loads. This applies well to Shoulder Pain Exercises for most arthritic patterns.