


Pleural Tapping Site: Key Points, Risks, and Indications
Dr. Pawan Kumar Mangla
Standard teaching says any fluid pocket will do. That advice creates avoidable harm. The pleural tapping site determines safety, diagnostic yield, and patient comfort. I will set out where to enter, how to proceed, and when to stop. It is basically a disciplined process anchored in anatomy, ultrasound, and respectful caution.
Anatomical Landmarks and Optimal Sites for Pleural Tapping
Posterior Approach: Triangle of Safety
The posterior-lateral triangle of safety remains a dependable pleural tapping site when the effusion layers dependently. As Radiopaedia notes, it is bounded by the lateral borders of pectoralis major and latissimus dorsi with the apex at the axilla, and it aligns near the 5th intercostal space in many adults. I target the superior edge of the rib to avoid the neurovascular bundle. This geometry reduces risk and gives predictable access to the pleural space.
-
Use the upper border of the rib below the chosen interspace.
-
Aim just above the diaphragm level on expiration in sitting patients.
-
Confirm fluid depth with ultrasound before needle entry.
In practice, the triangle is forgiving. But improper angulation or low interspaces can breach the diaphragm. That is the avoidable complication.
Lateral Approach: Mid-Axillary Line
For many effusions, the mid-axillary line offers the most reproducible pleural tapping site. The line runs vertically through the middle of the axilla and provides a straight path over a broad fluid meniscus. I mark the intended interspace on end-expiration after ultrasound confirmation of fluid depth. This approach suits large or moderate effusions and can be performed at bedside with appropriate monitoring.
-
Select the interspace where the fluid pocket is deepest in the safe window.
-
Keep the patient sitting upright if feasible to widen rib spacing.
-
Insert over the upper rib margin with a controlled, deliberate advance.
The lateral route balances accessibility and safety. It also simplifies catheter placement if prolonged drainage is required later.
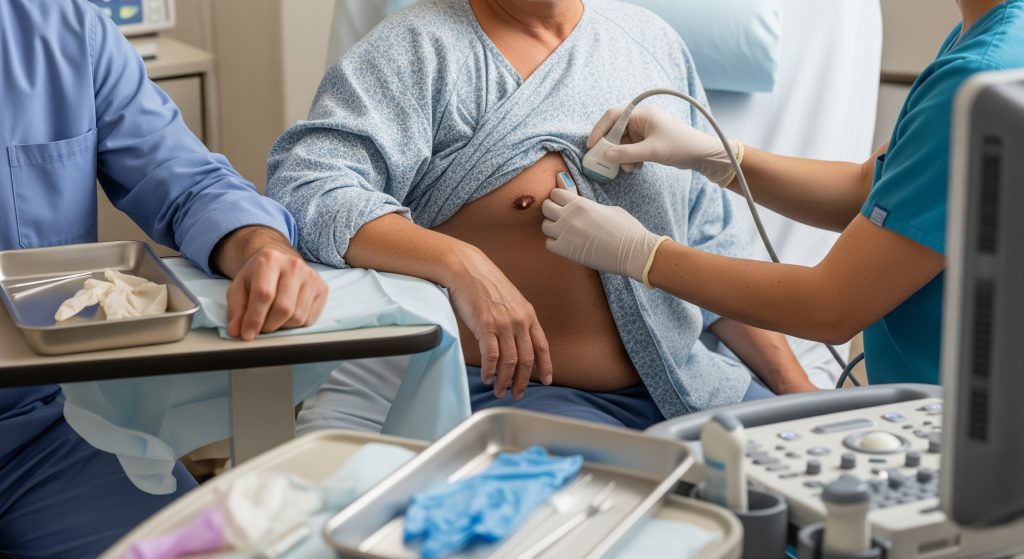
Ultrasound-Guided Site Selection
Ultrasound converts uncertainty into geometry. I use it to confirm the pleural tapping site, measure fluid depth, map diaphragm excursion, and mark the needle path. A low-frequency probe is sufficient. I scan in longitudinal and transverse planes, then mark skin with a sterile pen. In patients with loculations, ultrasound guidance is not optional. It is the difference between a dry tap and a diagnostic yield.
-
Assess safe distance from skin to lung and to diaphragm.
-
Identify vascular structures and adhesions where possible.
-
Recheck with the patient in the planned position before skin prep.
When effusions are small or septated, I choose the most stable pocket rather than the largest. Stability protects the lung during respiration.
Patient Positioning for Different Sites
Position dictates access, and access dictates safety. I prefer the upright seated posture with the patient leaning slightly forward, forearms on a pillow or table. This opens interspaces and lets the diaphragm fall. A lateral decubitus posture is an alternative for those who cannot sit, though it complicates landmarking and breath control.
-
Sitting upright improves rib separation and tactile feedback.
-
Lateral decubitus may be used when haemodynamics limit sitting.
-
Supine access is a last resort for critical patients, and only with ultrasound.
Better positioning enhances the accuracy of the pleural tapping site and lowers pneumothorax risk. Small adjustments matter (even a few degrees of trunk flexion).
Anatomical Variations to Consider
Anatomy varies, sometimes markedly. Hyperinflated lungs, prior surgery, scoliosis, or large body habitus alter the usual relations. I never assume the diaphragm sits at a textbook level. A high-riding diaphragm or fused pleura can turn a routine pleural tapping site into a hazard. Ultrasound rescues the plan by showing the real map.
-
Postoperative scarring narrows safe interspaces.
-
Kyphoscoliosis shifts fluid pockets posteriorly.
-
Emphysema pushes lung more inferiorly than expected.
The principle is simple. Map first, then puncture. Not the other way round.
Step-by-Step Thoracentesis Procedure and Technique
1. Pre-Procedure Assessment and Preparation
I begin with indication, imaging review, and a consent that explains benefit and risk plainly. Coagulation parameters are considered in context, not as an automatic barrier. I review medications, especially antiplatelets and anticoagulants, and plan timing. A focused respiratory exam and point-of-care ultrasound confirm the pleural tapping site, effusion size, and depth. Oxygen, monitoring, and resuscitation equipment should be available.
-
Confirm indication and therapeutic vs diagnostic objective.
-
Mark the skin after ultrasound in the planned position.
-
Set a removal volume target to reduce re-expansion risk.
I summarise the thoracentesis procedure steps with the team before skin prep. A short brief prevents long problems.
2. Equipment Setup and Sterile Field
Preparation prevents contamination and delay. I assemble antiseptic solution, sterile drapes, syringes, collection bottles, a drainage set or three-way tap, and labels. I also confirm tubing connections and suction readiness. Needle choice matters for control and flow. As MSD Manual notes, a 16-19 gauge thoracentesis needle is typical, paired with local anaesthetic and sterile skin preparation.
-
Maintain a clean-to-dirty workflow on the tray.
-
Use full aseptic technique, including sterile gloves and drape.
-
Prime the tubing and verify the collection pathway.
A quiet, organised setup reduces error and helps the patient remain calm.
3. Local Anaesthesia Administration
Adequate anaesthesia is humane and practical. I infiltrate the skin, subcutaneous tissue, and periosteum at the entry point, then the intercostal muscles and parietal pleura along the intended track. Slow infiltration prevents tissue distortion and maintains the chosen pleural tapping site trajectory. I aspirate as I infiltrate to avoid intravascular injection. Allow a minute for full effect.
-
Raise a small skin wheal first for orientation.
-
Track down to the superior rib margin, then advance just above it.
-
Infiltrate the parietal pleura last, where pain is greatest.
Good anaesthesia improves cooperation. Cooperation improves safety.
4. Needle Insertion Technique
Once the field is ready, I align the needle perpendicular to the chest wall, slightly caudal to cranial in the posterior-lateral approach. I stabilise my hand on the rib to control depth. Aspiration begins before pleural entry, using gentle negative pressure. The moment fluid appears, I pause and confirm the pleural tapping site trajectory with a small aspirate. I then connect to the drainage system and lock the needle or catheter in position.
-
Advance just over the superior rib margin.
-
Apply gentle suction to confirm fluid entry without lung injury.
-
Secure the set before larger-volume drainage.
Force and haste have no role here. Controlled motion preserves the lung.
5. Fluid Aspiration and Collection
I decide the initial withdrawal volume by symptoms, physiology, and ultrasound findings. Therapeutic drainage relieves dyspnoea and can improve mechanics quickly. Diagnostic sampling requires aseptic collection in appropriate tubes for chemistry, microbiology, and cytology. I label at the bedside and document the pleural tapping site for future reference. As far as current data suggests, steady, moderate drainage is kinder to the lung than rapid vacuum draws.
-
Collect the first 10-20 mL for laboratory analysis.
-
Continue therapeutic drainage if the patient tolerates it.
-
Stop for chest pain, cough, or oxygen desaturation.
Ultrasound guidance increases first-pass success and lowers complication rates. That remains true across varied body types and effusion sizes.
6. Post-Procedure Care and Monitoring
Observation after drainage is not ceremonial. I monitor for respiratory symptoms, oxygen needs, and haemodynamic instability. A focused ultrasound or chest imaging may be considered if symptoms arise or if the tap was technically difficult. I inspect the puncture site and ensure a clean dressing. Documentation should include the pleural tapping site, volume removed, and immediate tolerance.
-
Assess breath sounds and oxygen saturation at intervals.
-
Reassess pain and cough, which may foreshadow complications.
-
Plan follow-up imaging based on clinical trajectory, not rote habit.
Clear discharge advice matters. Patients remember simple, specific instructions best.
Risks, Complications, and Safety Precautions
Immediate Complications to Watch For
Complications cluster early. I watch for pneumothorax, vasovagal reactions, bleeding, cough, and chest discomfort. A sudden increase in cough or pleuritic pain suggests pleural irritation or rapid re-expansion. Hypotension may reflect a vasovagal episode. Any air aspiration or new dyspnoea requires prompt evaluation and supportive care.
-
Pneumothorax with reduced breath sounds or rising work of breathing.
-
Haemothorax indicated by worsening pain and haemodynamic change.
-
Air embolism is rare but catastrophic – maintain vigilance.
Most events are mitigated by ultrasound, controlled drainage, and vigilant monitoring.
Pneumothorax Prevention and Management
Prevention begins with choosing a safe pleural tapping site and confirming fluid depth. I avoid low interspaces where the diaphragm rises. I also stop drainage for cough or chest pain. If pneumothorax is suspected, I examine with ultrasound first in most settings. Small, stable pneumothoraces may be observed. Larger or symptomatic ones may need a drain.
-
Use the upper rib margin to spare the neurovascular bundle.
-
Keep the needle stable as the patient breathes shallow breaths.
-
Do not chase a vanishing pocket as fluid drains – reposition if required.
Prevention is cheaper than a chest tube. Always.
Bleeding and Vascular Injury Risks
Intercostal vessels run along the inferior border of each rib. That is why I always track over the superior edge. Coagulopathy increases risk, but technique still determines outcome. Gentle, single-pass entry guided by ultrasound reduces vessel injury and haematoma. If bleeding occurs, I apply pressure and reassess haemodynamics. Persistent bleeding mandates escalation.
-
Use small, deliberate movements during needle advancement.
-
Check platelet function history and current medications.
-
Mark and avoid visible collateral vessels on ultrasound.
The most reliable haemostatic measure is thoughtful needle control.
Re-expansion Pulmonary Oedema
Re-expansion oedema is uncommon but serious. It typically follows rapid, large-volume drainage of a long-standing effusion. I reduce risk by removing fluid in stages and pausing if chest pain, cough, or hypoxia appears. Supplemental oxygen and supportive care are first-line if it develops. Mechanical ventilation is rarely needed but should be available.
-
Avoid rapid high-vacuum drainage in chronic effusions.
-
Stop for symptoms and reassess with ultrasound.
-
Document the volume and the patient’s tolerance in real time.
Slow is safe. That simple rule prevents most episodes.
Contraindications for Pleural Tapping
Absolute contraindications are few. An uncooperative patient without sedation options, an uncorrectable bleeding diathesis with high risk, and infection at the skin entry site are high-level barriers. Relative ones include small or loculated effusions where no safe pleural tapping site exists, severe respiratory compromise without support, and suspected hydatid disease. I do not proceed if ultrasound cannot define a safe window.
-
Postpone if the planned tract crosses an infected skin area.
-
Rethink in severe coagulopathy not correctable in time.
-
Escalate to advanced imaging for uncertain anatomy.
The safest procedure is the one deferred until safe to perform.
Clinical Indications and Fluid Analysis
Common Pleural Effusion Causes
Indications cluster around diagnosis and symptom relief. I consider the big categories when selecting the pleural tapping site. Transudates arise from hydrostatic or oncotic shifts, commonly heart failure or cirrhosis. Exudates reflect local inflammation or malignancy, such as pneumonia, tuberculosis, pulmonary embolism, or metastatic disease. The differential frames the sampling plan and the urgent actions.
-
Transudate: heart failure, nephrotic syndrome, cirrhosis.
-
Exudate: infection, malignancy, pulmonary embolism, pancreatitis.
-
Haemothorax or chylothorax require tailored collection and urgent attention.
When in doubt, I sample. The fluid will tell the story if collected correctly.
Key Symptoms Requiring Investigation
Symptoms guide urgency and where to set the pleural tapping site. Dyspnoea, pleuritic chest pain, cough, and reduced exercise tolerance are common. Fever, weight loss, and night sweats shift the suspicion toward infection or malignancy. I also look for unilateral leg swelling or chest discomfort that hints at embolic disease. Examination findings such as dullness to percussion and reduced breath sounds fit the picture.
-
Rapidly progressive breathlessness demands timely relief.
-
Pleuritic pain may reflect inflammation near the parietal pleura.
-
Systemic features raise the stakes for urgent diagnosis.
Think symptoms first, then imaging, then the needle. In that order.
Light’s Criteria for Fluid Classification
Classification informs the next steps and the follow-up plan. As MDCalc summarises, exudate is present if any one of three conditions is met: pleural fluid protein to serum protein ratio greater than 0.5; pleural fluid LDH to serum LDH ratio greater than 0.6; or pleural fluid LDH greater than two-thirds the upper limit of normal serum LDH. I record the sampling order and timing relative to serum draws to maintain interpretive integrity.
|
Criterion |
Exudate if |
|---|---|
|
Protein ratio |
Pleural/Serum > 0.5 |
|
LDH ratio |
Pleural/Serum > 0.6 |
|
Absolute LDH |
Pleural LDH > 2/3 normal serum upper limit |
Light’s criteria are robust, though not infallible. Albumin or cholesterol gradients can help in borderline cases.
Interpreting Laboratory Results
Interpretation is pattern recognition, not number worship. I integrate Light’s classification with pH, glucose, cell counts, Gram stain, and cytology. Very low pH or glucose suggests complicated parapneumonic effusion or empyema. Neutrophil predominance points to acute infection, while lymphocyte predominance raises suspicion for malignancy or tuberculosis. Triglycerides help diagnose chylothorax. I then decide on antibiotics, intrapleural therapy, or oncology referral.
-
pH less than 7.2 typically signals the need for drainage in infection.
-
High amylase may suggest oesophageal rupture or pancreatitis.
-
Haematocrit near blood levels indicates haemothorax.
In practice, pleural fluid analysis interpretation is strongest when clinical context is explicit on the request form.
When to Repeat Thoracentesis
Repeat sampling is justified when the diagnosis remains unclear, the clinical state changes, or new imaging shows loculations. I repeat when cytology is initially negative but suspicion for malignancy remains high. I also repeat for symptom control if fluid reaccumulates and other options are not yet feasible. Each repeat begins with a fresh ultrasound map and a new pleural tapping site mark.
-
New fever or pain after improvement warrants reassessment.
-
Recurrent malignant effusions may need indwelling catheter planning.
-
Empyema with septations may need image-guided catheter placement.
Iteration is a feature, not a failure, when aligned with new evidence.
Conclusion
Safe thoracentesis rests on three habits. Choose the right pleural tapping site with ultrasound, execute a deliberate sterile technique, and stop when the patient or physiology demands it. The site is not a guess. It is a measured decision shaped by anatomy, symptoms, and intended yield. Do that consistently and complications fall while diagnostic clarity rises.
Frequently Asked Questions
What is the safest site for pleural tapping in most patients?
In a cooperative, seated adult, I favour a lateral-entry pleural tapping site along the mid-axillary line over the upper border of a rib that overlies a confirmed fluid pocket. Ultrasound should confirm depth and diaphragm position. The triangle of safety is a dependable alternative for posterior-lateral access when the effusion layers dependently.
How much pleural fluid can be safely removed in one session?
There is no single universal volume. I remove fluid to symptomatic relief while monitoring pain, cough, and oxygenation. If drainage has been rapid or the effusion is chronic, I adopt a staged approach and pause with warning signs. This reduces the risk of re-expansion pulmonary oedema. The pleural tapping site remains valid for a return if symptoms persist.
Can pleural tapping be performed at bedside without imaging?
Yes, but I do not recommend blind entry when ultrasound is available. Ultrasound confirms the pleural tapping site, maps diaphragm excursion, and improves first-pass success. In unstable settings without imaging, use robust surface landmarks and the safest window, then proceed with exceptional caution.
What are the absolute contraindications for thoracentesis?
Absolute contraindications are rare. They include inability to cooperate without safe sedation, infection at the intended entry site, and uncorrectable severe bleeding risk. Relative concerns include very small or loculated effusions without a safe window, severe hypoxaemia without respiratory support, and suspected hydatid disease. The pleural tapping site must be demonstrably safe before proceeding.
How long should patients be monitored after pleural tapping?
I observe patients long enough to confirm symptom stability and exclude early complications. Monitoring includes pulse oximetry, respiratory rate, and reassessment of pain or cough. If the procedure was straightforward and the patient is stable, discharge with clear safety-net advice is reasonable. Complex cases require longer observation and targeted imaging.
When should ultrasound guidance be mandatory for thoracentesis?
Ultrasound is mandatory when the effusion is small, loculated, or anatomically complex, or when the patient cannot sit. It is also essential when prior surgery, scoliosis, or emphysema distort normal relations. In these scenarios, site confirmation is not negotiable. The pleural tapping site must be defined in real time with ultrasound.
For completeness, I review thoracentesis procedure steps in detail above. I also outline pleural effusion causes and pleural effusion symptoms that prompt investigation and define the plan for pleural fluid analysis interpretation.