


Explainer: What Is the Pleural Tap Procedure?


Conventional advice says to wait and see when fluid collects around a lung. That approach often delays relief and blurs the diagnosis. The Pleural Tap Procedure gives you both at once. You gain a sample for testing and you gain space to breathe. It is essentially a careful needle procedure that targets the pleural space. Done well, it is swift, safe, and decisive.
What Is a Pleural Tap Procedure
Definition and Purpose of Thoracentesis
The Pleural Tap Procedure, also called thoracentesis, removes fluid from the pleural space for relief and testing. As StatPearls explains, it serves diagnostic and therapeutic roles when pleural fluid impairs breathing or when the cause is uncertain.
In practice, the thoracentesis procedure is minimally invasive. It aims to ease breathlessness and collect fluid for laboratory review. As STANDARD TREATMENT GUIDELINES PEDIATRICS & PEDIATRIC SURGERY note, symptom relief and diagnostic clarity are the twin goals.
Where breathlessness is severe, larger volumes can be removed. As UpToDate reports, large volume drainage may exceed one litre to reduce distress and improve lung expansion.
Here is the practical outcome. You breathe easier, and clinicians learn what drove the fluid build up. Two wins from one carefully controlled intervention.
How the Pleural Tap Works
The Pleural Tap Procedure accesses the pleural space with a fine needle or catheter. As StatPearls notes, clinicians typically enter between the sixth and eighth intercostal spaces, guided by anatomy and imaging.
Ultrasound or chest imaging refines the entry site. As Johns Hopkins Medicine explains, pre procedure imaging and monitoring improve accuracy and safety during the appointment.
A local anaesthetic is used. Fluid is then withdrawn gradually with syringe suction or a drainage system. As Cleveland Clinic outlines, imaging guidance makes the thoracentesis procedure more precise and lowers complication rates.
The mechanism is simple physics. Free the fluid, re expand the lung, and you ease effort with each breath. Better mechanics. Better comfort.
Types of Pleural Fluid Analysis Performed
After the Pleural Tap Procedure, the laboratory runs targeted tests on the sample. As StatPearls details, common assays include protein, glucose, lactate dehydrogenase, cell count, and cytology.
Distinguishing transudate from exudate directs your next steps. As UpToDate notes, Light’s criteria and related biomarkers help sort cardiac causes from infection or malignancy.
For suspected tuberculosis, fluid alone can be limited. As National TB Programme SOP explains, bacilli often reside in the pleural wall, and 20 to 50 ml is the minimum volume recommended for processing.
Think of pleural fluid analysis as a decision map. Each result removes uncertainty and narrows the treatment plan.
Diagnostic vs Therapeutic Thoracentesis
The Pleural Tap Procedure can be purely diagnostic, purely therapeutic, or both. As StatPearls clarifies, diagnostic taps investigate unexplained effusions, suspected infections, or malignancy.
Therapeutic drainage prioritises symptom relief. Larger effusions compress the lung and strain breathing. Draining them improves comfort and lung function, a point StatPearls on pleural effusion reiterates for clinical workflows.
In many cases, you gain both. Relief now. Data for targeted treatment later. That is the value of a well planned thoracentesis procedure.
When Is a Pleural Tap Necessary
Common Pleural Effusion Symptoms
Typical pleural effusion symptoms include breathlessness, pleuritic chest pain, and a dry cough. As StatPearls notes, symptoms may worsen with movement or lying flat.
Orthopnoea and chest discomfort also point toward fluid accumulation. As Cleveland Clinic explains, heart failure and infections are common culprits, and these signals should not be ignored.
Shortness of breath is not specific by itself. The context, physical exam, and imaging complete the picture.
Medical Conditions Requiring Thoracentesis
Clinicians consider a Pleural Tap Procedure when the cause is unclear or when fluid volume is high. As StatPearls states, indications include suspected infection, malignancy, tuberculosis, and differentiation of cardiac from non cardiac causes.
In paediatrics, empyema can follow pneumonia and may need drainage. As STANDARD TREATMENT GUIDELINES PEDIATRICS indicate, thoracentesis helps restore ventilation and informs antibiotic therapy.
For large effusions, symptom control matters. As UpToDate notes, therapeutic drainage reduces dyspnoea whether the effusion is due to heart failure or malignancy.
Exudative effusions often reflect infection or cancer. As StatPearls adds, these scenarios often require both drainage and further investigation.
Identifying Pleural Effusion Causes
You should think in two broad categories first. Transudates and exudates. As StatPearls describes, heart failure often drives transudates, while infection or malignancy drives exudates.
Pneumonia is a common trigger for exudative fluid. As India Respiratory Guidelines confirm, complications from pneumonia can seed an effusion that demands tailored management.
For structured triage, Light’s criteria remain the standard. As American Family Physician explains, the comparison of serum and pleural values guides accuracy and next steps.
Broader overviews align with this approach. As Penn Medicine notes, exudates arise from inflammation, while transudates reflect hydrostatic imbalance in conditions like heart failure.
When you see pleural effusion causes listed in reports, you can translate them into action. Drain. Analyse. Treat upstream drivers.
Pre-procedure Testing and Evaluation
Pre procedure evaluation reduces risk and clarifies goals. As PMC reviews, the combination of clinical assessment, imaging, and laboratory studies aligns the plan with likely causes.
Screen for red flags and complications. As PMC highlights, early recognition of pneumothorax risk and infection is central to procedural safety.
Where tuberculosis is a possibility, targeted workups matter. As Extrapulmonary TB Training outlines, primary care teams should be supported to investigate and refer appropriately.
Evidence based algorithms help as well. As American Family Physician sets out, integrated imaging and lab pathways improve diagnostic confidence before the needle touches skin.
The Pleural Tap Procedure Step by Step
1. Patient Preparation and Positioning
Preparation begins with consent, site planning, and equipment readiness. Proper positioning unlocks a safer corridor. As Critical Care Guidelines advise, you are typically seated, leaning forward to widen the intercostal space.
Risk counselling is part of preparation. As Cleveland Clinic notes, you should be briefed on pneumothorax, infection, and bleeding so you know what to expect.
-
Remove or adjust clothing to expose the lateral chest safely.
-
Confirm imaging and mark the site with ultrasound if appropriate.
-
Secure monitoring, oxygen if indicated, and ready sterile equipment.
2. Local Anaesthetic Administration
Adequate local anaesthesia is not optional. It is the foundation of a controlled Pleural Tap Procedure. As District Hospital Guidelines state, effective local anaesthetic increases comfort and cooperation.
Technique matters as much as dose. As StatPearls emphasises, infiltrate from skin to periosteum and pleura so deeper tissues are covered before insertion.
Broader guidance converges on the same point. As Critical Care Guidelines advise, anaesthetic should be layered around the entry site to pre empt pain signals.
Analgesia is also a safety tool. As Chest reports, local anaesthesia reduces physical and psychological distress, which in turn keeps the field still and predictable.
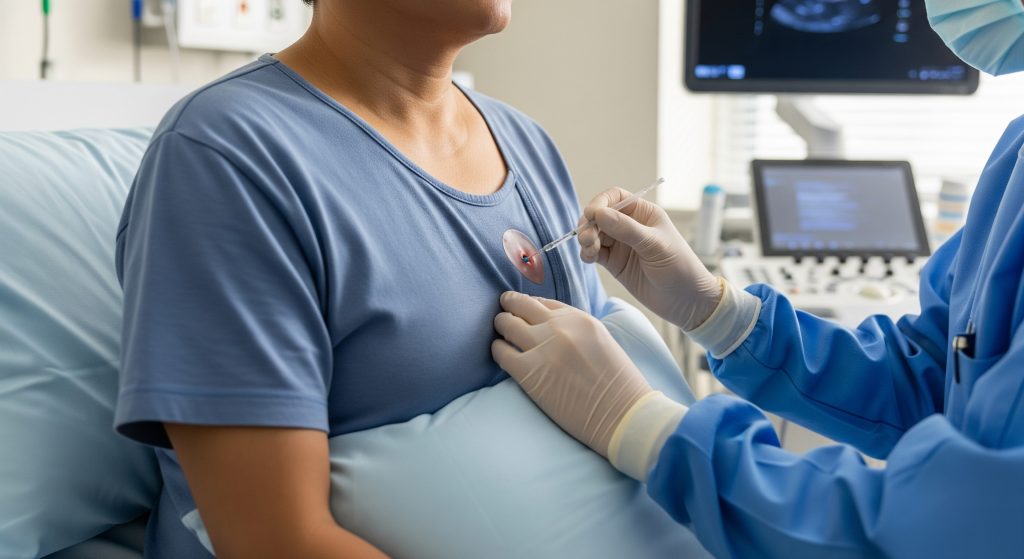
3. Needle Insertion and Fluid Extraction
Once numb, a fine needle or catheter enters the pleural space. Ultrasound at the bedside changes the game. As StatPearls notes, ultrasound guidance reduces complications and improves yield across patient types.
Fluid is aspirated slowly while you are monitored. The operator watches for cough, chest discomfort, or vasovagal signs. And yet, the process remains simple. Insert. Confirm. Drain in controlled fashion.
-
Advance into the pleural space with aspiration for confirmation.
-
Attach collection system and drain to target volume.
-
Clamp and pause if you feel chest tightness or persistent cough.
4. Sample Collection and Analysis
Clean sampling prevents false results. As StatPearls states, you collect aliquots for chemistry, microbiology, and cytology to support pleural fluid analysis.
The first laboratory question is whether the fluid is transudative or exudative. As PMC summarises, this split directs the search toward heart failure or toward inflammatory or malignant processes.
Interpretation requires clinical context. As PMC advises, Light’s criteria help, but results should be weighed against the likely aetiology and the reliability of each test.
The take home point is straightforward. Good sampling makes good decisions possible.
5. Post-procedure Monitoring
Observation after the Pleural Tap Procedure is not a formality. It is risk management. As Medicine Guidelines detail, watch for pneumothorax, infection, and re expansion pulmonary oedema after large volume drainage.
Monitoring focuses on respiratory rate, oxygen saturation, and comfort. As StatPearls notes, new distress warrants prompt review and possibly imaging.
Where volumes exceed roughly 1.5 litres or comorbid lungs exist, a chest X ray is reasonable. This is a safeguard rather than routine over testing.
Risks, Recovery and Results
Potential Complications to Consider
Complications are uncommon when the Pleural Tap Procedure is guided and supervised. Infection prevention protocols lower risk further. As National Guidelines emphasise, standardised asepsis and handling reduce downstream infections.
Bleeding risk should be screened and managed. As CGHS notes, haemostatic status and careful technique limit bleeding events during pleural interventions.
Operator expertise matters. As PMC reports, pneumothorax rates drop with ultrasound use and experienced hands, which aligns with current quality standards.
The UK picture underlines this. As British Thoracic Society highlights, standardised training and imaging are essential to avoid preventable harm during pleural procedures.
And yet, the risk is not zero. You should still be told what to watch for after discharge.
Recovery Timeline and Aftercare
Most people feel easier breathing immediately after the Pleural Tap Procedure. Local soreness can last a day or two. As MyHealth Alberta explains, simple wound care and rest help recovery proceed smoothly.
Care for the site with soap and water, then pat dry. Avoid hydrogen peroxide on the wound, which can delay healing. Activities can resume as comfort returns, but avoid strenuous exercise until cleared.
-
Keep the dressing clean and dry for 24 hours unless advised otherwise.
-
Resume light walking the same day if you feel steady.
-
Check for new pain, fever, or breathlessness during the first 24 to 48 hours.
Recovery is usually quick. But still, respect any new symptoms and request review early.
Understanding Your Test Results
Your report will separate results by category and test. As CHEST Journal notes, distinguishing transudates from exudates shapes the treatment pathway and any oncology or infectious workup.
Typical panels list protein, LDH, glucose, pH, and cytology. As LITFL describes, higher LDH may suggest inflammation or malignancy, while low glucose can suggest infection or rheumatoid serositis.
|
Marker |
What it can suggest |
|---|---|
|
Protein and LDH |
Light’s criteria to classify transudate vs exudate. |
|
Glucose |
Low values may point to infection or rheumatoid disease. |
|
pH |
Lower pH often aligns with complicated infection. |
|
Cytology |
Malignant cells support a cancer related effusion. |
Here is what this means. Results do not treat you by themselves. They direct the next clinical move with real precision.
When to Seek Medical Attention
Some symptoms demand urgent review after a Pleural Tap Procedure. As StatPearls advises, seek help for severe chest pain, new breathlessness, fever, or uncontrolled bleeding.
Post procedure instructions usually list red flags. As MyHealth Alberta outlines, any new shortness of breath or signs of infection should prompt immediate contact.
The same principle applies if symptoms worsen suddenly. As Cleveland Clinic notes, escalating pain or difficulty breathing after drainage warrants urgent care.
Rapid consultation is better than waiting. A small issue is easier to fix when found early.
Final Thoughts on the Pleural Tap Procedure
The Pleural Tap Procedure sits at the intersection of relief and diagnosis. It helps you breathe better and learn precisely what is wrong. In many cases, it shortens hospital stays and avoids unnecessary empiric treatment. The key is disciplined preparation, imaging guided technique, and prompt pleural fluid analysis. Get those right and outcomes improve. That is the point.
Two practical notes. First, list your medications and anticoagulants in advance, since bleeding risks need calibration. Second, discuss whether your effusion is likely transudative or exudative. The answer shapes the plan after the tap more than the tap itself.
If you are facing a thoracentesis procedure, ask three questions. What is the main suspected cause, what volume will be drained, and how will results change management. Clear answers signal a good process and a safer day.
Frequently Asked Questions
How painful is a pleural tap procedure?
Discomfort is usually brief and well controlled with local anaesthetic. You may feel pressure or a transient ache as fluid starts to drain. The needle insertion is numbed first to reduce sharp pain. Most describe it as tolerable rather than painful. If discomfort rises, tell the team so they can pause or adjust.
How long does thoracentesis take to perform?
Set up and consent can take 10 to 20 minutes. The fluid removal often takes another 10 to 30 minutes, depending on volume and your comfort. Imaging guided planning can add a few minutes but improves safety. Roughly speaking, you should allow about an hour from arrival to post procedure checks.
Can pleural effusion return after drainage?
Yes, if the underlying cause persists. Heart failure, malignancy, or infection can refill the space to some extent. That is why the Pleural Tap Procedure pairs relief with pleural fluid analysis. Treating the upstream cause is what prevents recurrence. Sometimes, indwelling catheters or pleurodesis are considered for recurrent cases.
What’s the difference between pleural tap and chest drain?
A pleural tap is a single session needle or catheter aspiration used for diagnosis and relief. A chest drain is a tube left in place to drain fluid or air continuously. You use a chest drain for ongoing pneumothorax management or large, recurrent effusions. The goals overlap, but the device and timeframe differ.
How much fluid is typically removed during thoracentesis?
Volumes vary. Small diagnostic samples may be under 100 ml. Therapeutic drainage can exceed one litre for symptomatic relief, guided by your tolerance. Many teams pause if you feel chest tightness or a persistent cough. The priority is safe relief, not a specific number.
When can I return to normal activities after the procedure?
Most people resume light activity the same day. Office work is usually possible within 24 hours if you feel stable. Avoid strenuous exercise or heavy lifting until your clinician confirms it is safe. If new breathlessness or chest pain occurs, pause activities and seek advice.
This page explains pleural effusion symptoms, outlines pleural effusion causes, and clarifies how pleural fluid analysis supports an accurate thoracentesis procedure.